Savor the Flavors: Step-by-Step Japanese Chashu Recipe at Home

Japanese Chashu Recipe

Entering the realm of Japanese cuisine, a captivating journey unfolds, revealing the nuanced artistry behind one of its most revered creations—Japanese Chashu. Beyond a mere pork belly dish, Chashu embodies a culinary marvel that adds a symphony of flavors to the humble ramen bowl.

Imagine tender pork belly, meticulously marinated and slow-braised to perfection, delivering a medley of textures and tastes that captivate the senses. Chashu stands as a testament to the precision and care ingrained in Japanese culinary traditions, elevating it to an iconic status.

In this culinary exploration, I invite you to join me in unraveling the intricacies of crafting the quintessential Japanese Chashu from the comfort of your own kitchen. From handpicking the perfect cut of pork belly to infusing it with a carefully concocted marinade, each step contributes to the creation of a culinary masterpiece. Let’s embark on this flavorful journey together as I share the secrets and techniques behind the creation of Japanese Chashu, bringing the essence of Japanese cuisine to your home.

Japanese Chashu Recipe Ingredients:

  • 2 pounds pork belly, skinless
  • 1 cup soy sauce
  • 1 cup sake
  • 1 cup mirin
  • 1 cup sugar
  • 6 garlic cloves, crushed
  • 1 tablespoon ginger, grated
  • 2 green onions, chopped
  • 1 tablespoon sesame oilStep-by-Step guide

Embark on a step-by-step journey with our guide to perfecting the art of Japanese Chashu. Learn to transform pork belly into a savory masterpiece through careful steps and rich flavors. Elevate your culinary skills today!

Step 1: Selecting the Perfect Pork Belly

The foundation of any great Chashu is the pork belly. Look for a well-marbled cut, as the fat will render during the braising process, infusing the meat with flavor and creating that melt-in-your-mouth texture we all crave.

Step 2: Preparing the Marinade

The key to Chashu’s irresistible taste lies in its marinade. In a bowl, combine soy sauce, sake, mirin, sugar, crushed garlic, grated ginger, chopped green onions, and a drizzle of sesame oil. This flavorful concoction will be the magic potion that transforms your pork belly into a savory masterpiece.

Step 3: Marinating the Pork Belly

Place the pork belly in a zip-top bag or a shallow dish and pour the marinade over it. Ensure that every inch of the meat is coated, allowing it to soak in the flavors. Seal the bag or cover the dish with plastic wrap and refrigerate for at least 4 hours or, ideally, overnight. This extended marination time will allow the pork to absorb the maximum amount of deliciousness.

Step 4: Slow and Low Braising

Once the pork has marinated to perfection, it’s time for the slow and low braise that will transform it into the tender delight that is Chashu. Preheat your oven to 275°F (135°C). Remove the pork from the marinade, reserving the liquid for later use. Roll the pork belly and secure it with kitchen twine to maintain its shape during cooking.

Place the pork in a roasting pan or oven-safe dish, and pour a bit of the reserved marinade over the top. Cover with foil and let it braise in the oven for about 3 to 4 hours, periodically basting with the marinade to ensure the meat remains moist and flavorful.

Step 5: Achieving that Perfect Char

As the pork belly reaches its peak tenderness, it’s time to introduce a subtle yet essential element – a tantalizing char. Remove the foil and increase the oven temperature to 425°F (220°C). Let the Chashu roast for an additional 15-20 minutes, or until the edges turn golden brown and slightly crispy.

Step 6: Slicing and Serving

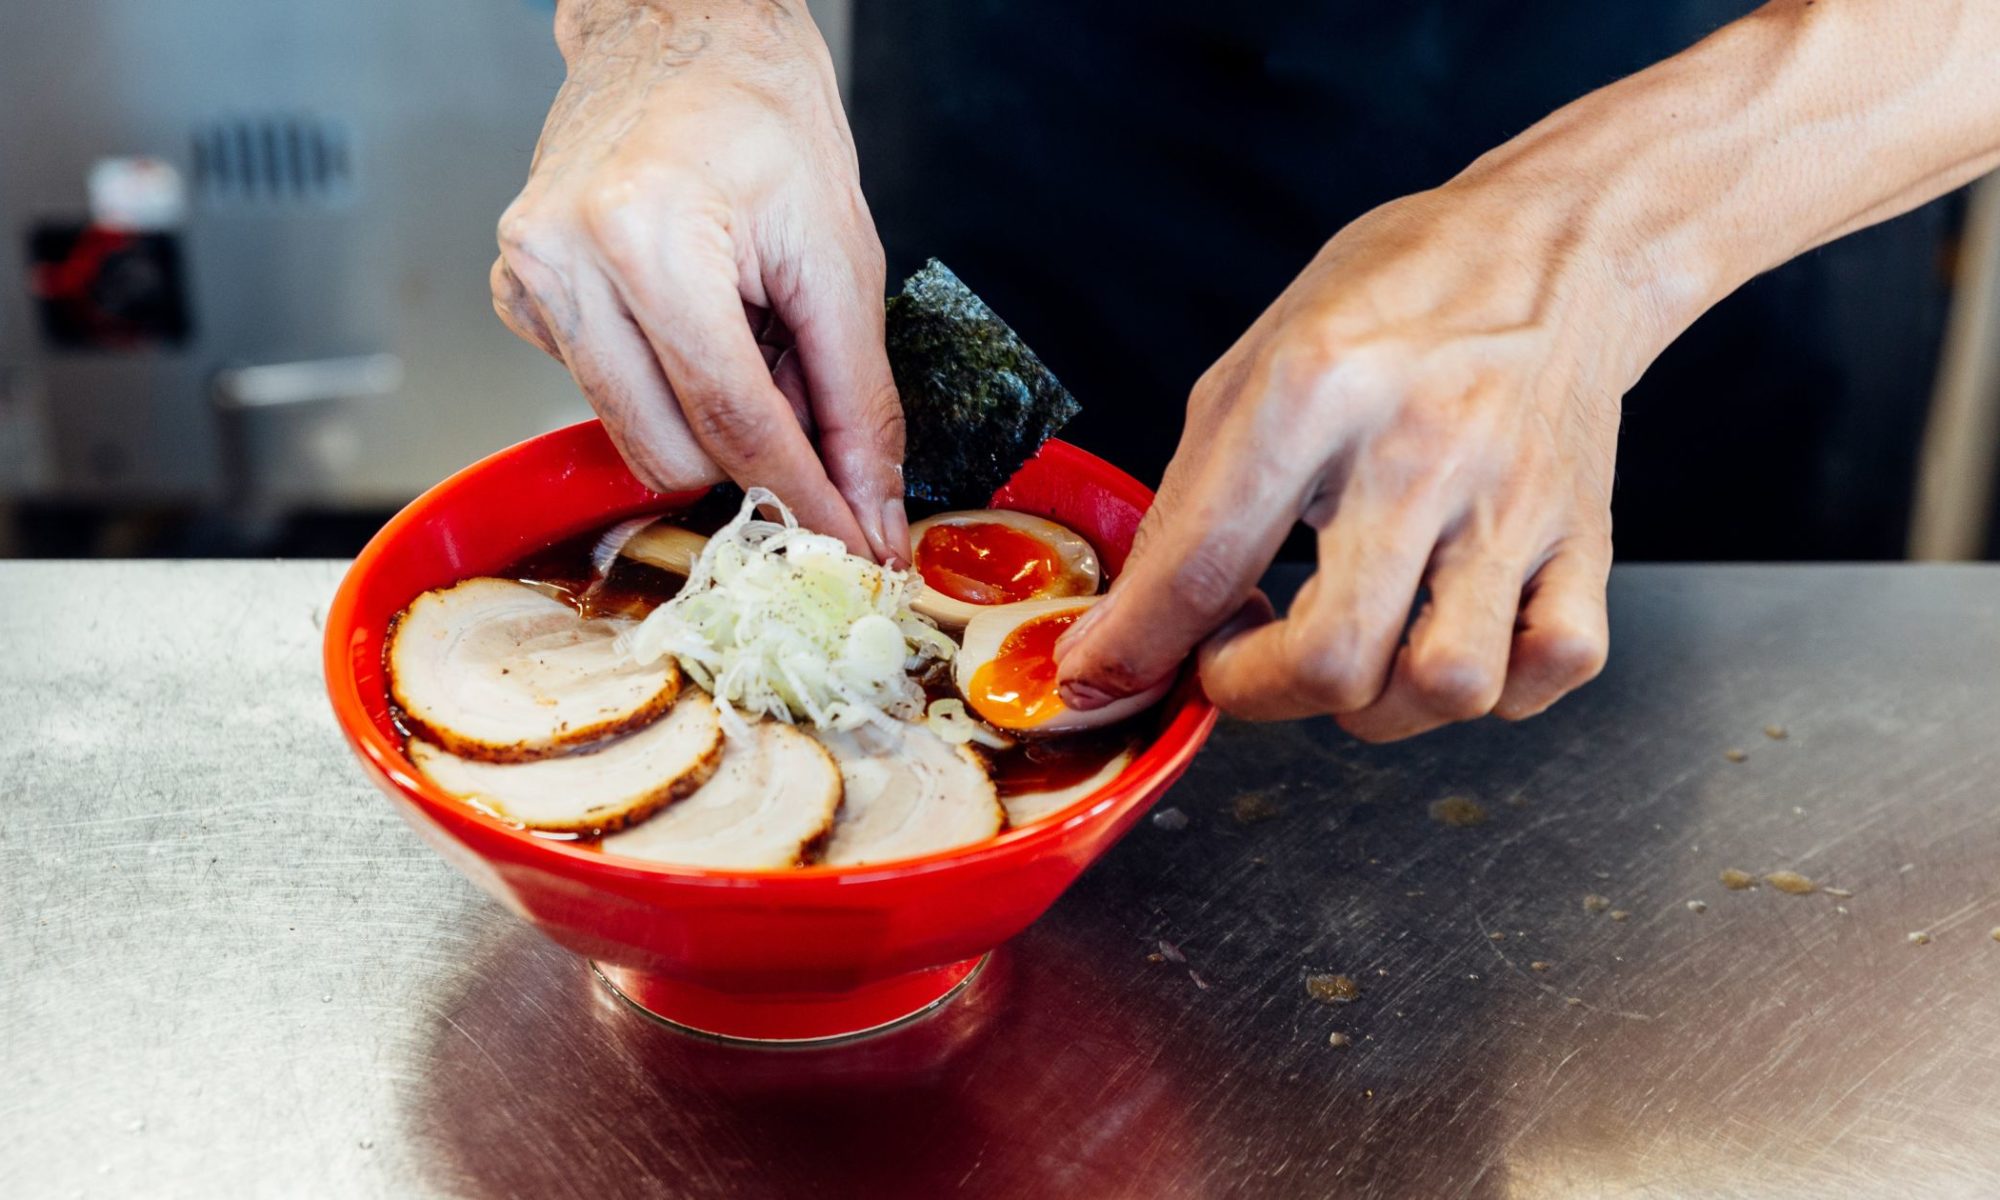
Allow the Chashu to cool for a few minutes before carefully removing the twine. Slice it into thin, succulent pieces that will gracefully adorn your ramen bowl. The Chashu is now ready to take its place as the crowning glory of your homemade ramen masterpiece.

Also Read: 10 Yummy Japanese Foods Adventures Await

Conclusion:

In essence, the journey to perfecting the Japanese Chashu has been a delightful exploration of flavors and culinary techniques. From carefully selecting the right cut of pork belly to immersing it in a rich marinade, the process has been an artful dance of ingredients and patience. As the pork belly undergoes the slow and low braise, the kitchen becomes a symphony of aromas, promising a culinary experience that transcends the ordinary.

Slicing into the finished Chashu reveals the fruits of this labor—a tender and succulent masterpiece. The interplay of soy sauce, sake, mirin, and aromatic spices has transformed the humble pork belly into a savory delight with layers of complexity. As the Chashu graces a bowl of ramen or stands proudly on its own, it serves as a testament to the beauty of homemade Japanese cuisine. This culinary journey, though concluding, leaves an enduring appreciation for the artistry that turns simple ingredients into a symphony of flavors, inviting you to savor the richness of Japanese Chashu with every bite.

Best Way to Cook Japanese Sweet Potato: A Culinary Exploration of Baking and Frying

Cook Japanese Sweet Potato

Japanese sweet potatoes, with their vibrant purple or reddish skin and sweet, creamy flesh, have become a favorite among food enthusiasts seeking a unique and nutritious addition to their meals. Packed with antioxidants, vitamins, and fiber, these potatoes not only offer a delectable taste but also contribute to a healthy diet. If you’re wondering about the best way to cook Japanese sweet potatoes to bring out their natural flavors and textures, you’re in for a treat. Let’s explore some delightful cooking methods that will elevate your culinary experience.

Baked Japanese Sweet Potato: Simplicity at Its Finest

Baking Japanese sweet potatoes is a straightforward method that allows the natural sweetness and nutty flavor of the tuber to shine through. This cooking technique preserves the integrity of the potato while delivering a delightful contrast between the caramelized exterior and the soft, flavorful interior.

Ingredients:

  • Japanese sweet potatoes
  • Olive oil (optional)
  • Sea salt (optional)

Instructions:

Preheat the Oven: Start by preheating your oven to 400°F (200°C).

Prepare the Potatoes: Wash and scrub the Japanese sweet potatoes thoroughly under running water. It’s essential to clean the skin, as it is edible and adds an extra layer of flavor. Pierce the potatoes with a fork to create small holes, allowing steam to escape during the baking process.

Place on Baking Sheet: Arrange the prepared sweet potatoes on a baking sheet. For easy cleanup, consider lining the sheet with parchment paper.

Bake Until Tender: Place the baking sheet in the preheated oven and bake for approximately 45-60 minutes. The exact time may vary depending on the size of the potatoes. To check for doneness, insert a fork or knife into the center of a potato; it should easily slide through when ready.

Optional Olive Oil and Sea Salt: While the potatoes are baking, you have the option to enhance their flavor by brushing them with a thin layer of olive oil and sprinkling a pinch of sea salt. This step is entirely optional but can add a subtle richness and savory element to the dish.

Serve and Enjoy: Once baked to perfection, allow the sweet potatoes to cool for a few minutes before serving. The result is a delectable combination of a crispy, caramelized exterior and a soft, sweet interior that requires no additional adornments.

Japanese Sweet Potato Fries: A Crispy Twist

For those who enjoy a bit of crunch, Japanese sweet potato fries offer a delightful alternative to traditional potato fries. This method transforms the sweet potato into crispy, golden delights with a creamy interior.

Ingredients:

  • Japanese sweet potatoes
  • Olive oil
  • Sea salt
  • Herbs or spices of choice (optional)

Instructions:

Preheat the Oven: Preheat your oven to 425°F (220°C).

Prepare the Potatoes: Wash and peel the Japanese sweet potatoes. Cut them into uniform strips to ensure even cooking.

Toss in Olive Oil and Seasonings: In a bowl, toss the sweet potato strips with olive oil, ensuring they are well-coated. Add a pinch of sea salt and any herbs or spices of your choice for added flavor. Some popular options include rosemary, thyme, or paprika.

Arrange on Baking Sheet: Spread the seasoned sweet potato strips in a single layer on a baking sheet. This allows for proper air circulation, ensuring even crisping.

Bake Until Golden Brown: Bake in the preheated oven for 25-30 minutes, flipping the fries halfway through to ensure even cooking. Keep an eye on them towards the end to prevent burning.

Serve with Dip: Once the sweet potato fries are golden brown and crispy, remove them from the oven. Serve them hot with your favorite dipping sauce—be it a classic ketchup, aioli, or a tangy yogurt-based dip—for a delightful twist on a classic side dish.

Mashed Japanese Sweet Potato: Velvety Perfection

Mashed Japanese sweet potatoes provide a luscious and velvety side dish that perfectly complements a variety of main courses. This method transforms the sweet, nutty flavor of the potatoes into a creamy delight that is not only delicious but also rich in nutrients.

Ingredients:

  • Japanese sweet potatoes
  • Butter or coconut oil
  • Salt and pepper to taste

Instructions:

Prepare the Potatoes: Begin by peeling and cubing the Japanese sweet potatoes. Uniform cubes ensure even cooking.

Boil or Steam: Cook the sweet potato cubes by either boiling them in a pot of water or steaming them until they are fork-tender. This usually takes about 15-20 minutes.

Mash with Butter or Coconut Oil: Drain the cooked sweet potatoes and transfer them to a mixing bowl. Add a generous knob of butter or a few tablespoons of coconut oil for richness. Use a potato masher or a fork to mash the sweet potatoes until smooth and creamy.

Season to Taste: Season the mashed sweet potatoes with salt and pepper, adjusting to your taste preferences. The inherent sweetness of the Japanese variety doesn’t need much seasoning, so start with a small amount and add more if needed.

Serve Warm: Mashed Japanese sweet potatoes are best served warm. They make an excellent side dish for roasted meats, grilled vegetables, or as a comforting addition to holiday feasts.

Optional Additions: For those who enjoy a bit of complexity in flavors, consider incorporating additions like cinnamon, nutmeg, or a drizzle of honey for a sweet and spiced variation.

Grilled Japanese Sweet Potato: Smoky Goodness

Grilling Japanese sweet potatoes impart a delightful smokiness that elevates the natural sweetness of the tuber. This method adds a layer of complexity to the flavor profile, making it an excellent choice for outdoor gatherings and barbecues.

Ingredients:

  • Japanese sweet potatoes
  • Olive oil
  • Salt and pepper
  • Optional: herbs or spices for additional flavor

Instructions:

Prepare the Potatoes: Wash and scrub the Japanese sweet potatoes thoroughly. Slice them into rounds of approximately 1/2 inch thickness.

Brush with Olive Oil and Season: In a bowl, toss the sweet potato rounds with olive oil to coat them evenly. Sprinkle with salt, pepper, and any additional herbs or spices you desire for added flavor.

Preheat the Grill: Preheat your grill to medium heat. If using charcoal, wait until the coals are ashed over. For gas grills, allow them to heat up for about 10-15 minutes.

Grill Until Charred and Tender: Place the sweet potato rounds directly on the grill grates. Grill for approximately 10-15 minutes, flipping the rounds halfway through. The sweet potatoes are ready when they develop a charred exterior and are fork-tender on the inside.

Serve and Enjoy: Once grilled to perfection, transfer the sweet potato rounds to a serving platter. This smoky and savory side dish pairs well with grilled meats and adds a unique twist to your barbecue repertoire.

Optional Garnishes: Enhance the grilled Japanese sweet potatoes with a squeeze of fresh lime or a sprinkle of chopped herbs like cilantro or parsley for a burst of freshness.

Also Read: What to Eat with Japanese Sweet Potato

Conclusion:

In the realm of Japanese sweet potatoes, a tapestry of flavors and textures is unveiled through four distinct cooking methods. From the simplicity of baking to the crispiness of fries, the velvety mash, and the smoky allure of grilling, each approach offers a unique experience for the taste buds. The versatility of Japanese sweet potatoes shines through, adapting effortlessly to different culinary techniques for those seeking a quick side or a more elaborate dish. As one delves into this culinary journey, it’s evident that the best way to cook Japanese sweet potatoes is a personal choice, allowing individuals to tailor their experience and savor the natural sweetness and wholesome goodness of this beloved tuber in diverse and delightful forms.

Japanese Egg Salad Sandwich Recipe: Craft a Delightful Culinary Fusion

Japanese Egg Salad Sandwich Recipe

In the realm of culinary exploration, few experiences match the enchantment of Japanese cuisine. Known for its delicate flavors, meticulous preparation, and artistic presentation, Japanese dishes have a unique ability to captivate the palate. Today, I venture into the realm of Japanese culinary artistry to unravel the secrets behind a beloved creation – the Japanese Egg Salad Sandwich. This delightful fusion of simplicity and sophistication promises to bring the essence of Japan right to your kitchen. Join me as I navigate the steps to craft this delectable sandwich, where each bite is a harmonious blend of tradition and innovation.

Japanese Egg Salad Sandwich Recipe Ingredients:

Hard-boiled Eggs: Start with fresh, high-quality eggs. Boil them until the yolks are fully set, usually around 10-12 minutes.

Japanese Kewpie Mayonnaise: This mayonnaise, with its rich and slightly sweet flavor, is a key ingredient in Japanese egg salad. It can be found in most Asian grocery stores or online.

Dijon Mustard: Add depth to your egg salad with a teaspoon of Dijon mustard. It provides a subtle kick without overpowering the dish.

Rice Vinegar: A splash of rice vinegar enhances the overall flavor profile, offering a mild acidity that complements the creaminess of the egg salad.

Sugar: A pinch of sugar balances the acidity and adds a hint of sweetness.

Salt and Pepper: Season to taste with salt and freshly ground black pepper.

Bread: Opt for soft, white Japanese milk bread or shokupan. Its pillowy texture provides the perfect base for the creamy egg salad.

Step-by-Step Culinary Journey:

1. Hard-Boil the Eggs:

Begin by placing your fresh eggs in a pot of water. Bring the water to a gentle boil, and then reduce the heat to a simmer. Allow the eggs to cook for 10-12 minutes, ensuring the yolks are fully set. Once done, transfer the eggs to a bowl of cold water to cool before peeling. This ensures easy peeling and perfectly cooked eggs.

2. Chop and Mash:

Finely chop the hard-boiled eggs with precision and care. Transfer the chopped eggs into a mixing bowl, and with a fork or potato masher, delicately mash them. Aim for a texture that’s slightly chunky, providing a satisfying bite to your Japanese Egg Salad.

3. Mayo Magic:

Introduce the star of Japanese mayo – Kewpie mayonnaise. Begin by adding a few tablespoons to the mashed eggs, and adjust the quantity to achieve your preferred level of creaminess. The Kewpie mayo, renowned for its rich umami flavor, imparts a distinctive Japanese touch to your egg salad.

4. Flavor Infusion:

Elevate the taste profile by incorporating additional flavors. Introduce a teaspoon of Dijon mustard for depth, a splash of rice vinegar for a subtle tang, a pinch of sugar to balance the acidity, and season with salt and pepper to taste. Thoroughly mix these ingredients to ensure a harmonious blend.

5. Assemble the Sandwich:

Take slices of the soft and airy Japanese milk bread – the perfect canvas for your creation. Generously spread the meticulously crafted egg salad mixture onto one slice of bread. Carefully top it with another slice to create a sandwich that harmonizes the rich flavors and textures.

6. Cut and Serve:

For a polished finish, trim the crusts if desired, and cut the sandwich into halves or quarters. This not only enhances the visual appeal but also makes the Japanese Egg Salad Sandwich easy to handle and share. The result is a visually enticing and scrumptious masterpiece, ready to be savored and shared with friends or enjoyed as a satisfying solo treat.

Serving Tips and Additional Delights

1. Fresh Ingredients for Vibrant Flavors:

Begin with high-quality, fresh ingredients. The richness of Japanese cuisine lies in the quality of its components. Choose farm-fresh eggs, crisp vegetables, and authentic Japanese Kewpie mayonnaise to ensure a vibrant and flavorful egg salad.

2. Bread Matters: Choose Wisely:

The bread you select is crucial. Opt for soft and pillowy Japanese milk bread or shokupan to provide the perfect canvas for your egg salad. The right bread enhances the overall texture and taste, contributing to the authenticity of the Japanese Egg Salad Sandwich.

3. Garnishes for Visual Appeal:

Elevate your presentation by incorporating fresh herbs like chives or green onions as a garnish. A visually appealing sandwich is not only more enticing but also reflects the care and precision associated with Japanese culinary aesthetics.

4. Complementary Sides and Pairings:

Enhance the overall experience by serving the Japanese Egg Salad Sandwich with thoughtful side dishes. Consider pickled vegetables, edamame, or a bowl of miso soup to create a well-rounded meal. The right pairings add depth and variety to your culinary adventure.

Summary

In summary, the Japanese Egg Salad Sandwich serves as a captivating journey into the heart of Japanese culinary artistry. With a delicate balance of flavors, this sandwich transforms a classic egg salad into a sophisticated experience. From the precise hard-boiling of eggs to the unique umami of Kewpie mayonnaise, each step contributes to a harmonious blend of tradition and innovation. Elevate your culinary repertoire by bringing a touch of Japan to your kitchen, where simplicity meets sophistication in every delectable bite.

Best Japanese Salad Dressing: Elevate Your Greens with the Top Picks

Japanese Salad Dressing

Hey fellow foodies, ever find yourself stuck in a salad rut, desperately yearning for something to elevate your leafy greens to a whole new level? Well, look no further! Today, we’re embarking on a culinary escapade into the enchanting realm of Japanese salad dressings. Bid adieu to bland and embrace the extraordinary as we delve into a symphony of flavors that Japanese dressings bring to the table. Picture this – a perfect blend of traditional essence and contemporary flair, all designed to turn your mundane salad into a gastronomic delight. So, fasten your seatbelts and get ready for a taste bud rollercoaster as we unveil the best Japanese salad dressings that are about to revolutionize your salad experience!

1. Sesame Miso Dressing: The Umami Bomb

One of the stars of Japanese cuisine, miso, takes center stage in this dressing. Combined with the nutty richness of sesame, this dressing adds a depth of umami to your salad. The velvety texture and savory notes make it an excellent choice for those looking to enhance the overall taste of their greens.

2. Ginger Carrot Dressing: A Zesty Kick

For those who prefer a zesty kick, the ginger carrot dressing is a delightful choice. The combination of fresh ginger and sweet carrots creates a vibrant and tangy flavor profile. This dressing not only adds a burst of freshness to your salad but also provides a nutritional boost, thanks to the goodness of carrots.

3. Yuzu Ponzu Dressing: Citrusy Elegance

Yuzu, a citrus fruit native to East Asia, brings a refreshing twist to traditional salad dressings. Yuzu ponzu dressing combines the bright, citrusy notes of yuzu with the savory depth of soy sauce. The result is a well-balanced dressing that adds a touch of elegance to your salad, making it a perfect accompaniment to both greens and proteins.

4. Soy Wasabi Dressing: A Spicy Affair

For those who crave a bit of heat, the soy wasabi dressing is a spicy affair that wakes up your taste buds. The pungent kick of wasabi combined with the savory soy sauce creates a dressing that not only adds a bold flavor to your salad but also pairs exceptionally well with sushi or grilled meats.

5. Miso-Sesame-Ginger Dressing: Fusion Bliss

Why settle for one flavor when you can have a fusion of the best? The miso-sesame-ginger dressing brings together three powerhouse ingredients to create a symphony of flavors. The umami from miso, the nuttiness from sesame, and the zing from ginger blend seamlessly to offer a complex yet harmonious dressing that takes your salad experience to new heights.

6. Yogurt Wasabi Dressing: Creamy Heat

Combine the cool creaminess of yogurt with the fiery punch of wasabi, and you get a dressing that adds a delightful contrast to your salad. The yogurt wasabi dressing not only brings a velvety texture but also a unique blend of heat and tanginess. Perfect for those who enjoy a creamy dressing with a kick.

7. Soy Sesame Citrus Dressing: Asian Fusion Twist

Give your salad a zesty and aromatic touch with the soy sesame citrus dressing. This fusion of soy sauce, sesame oil, and citrusy undertones creates a light and refreshing dressing. The combination of savory, nutty, and tangy flavors makes it an excellent choice for a wide range of salads, from leafy greens to noodle salads.

8. Miso Tahini Dressing: Nutty Umami Blend

Unleash the power of two pantry staples with the miso tahini dressing. The rich and earthy notes of miso meld seamlessly with the creamy texture of tahini, resulting in a dressing that’s both indulgent and nutritious. Drizzle it over your salad to experience a perfect balance of nutty and umami flavors.

9. Sake Honey Mustard Dressing: Sweet Elegance

Add a touch of sophistication to your salad with the sake honey mustard dressing. The sweet and floral notes of sake complement the robustness of honey mustard, creating a dressing that’s both sweet and savory. This versatile dressing pairs exceptionally well with grilled chicken or a bed of fresh greens.

10. Sesame Ponzu Vinaigrette: Light and Citrusy

Experience the best of both worlds with the sesame ponzu vinaigrette. This light and citrusy dressing combines the nuttiness of sesame with the bright acidity of ponzu, creating a vinaigrette that’s perfect for salads that need a refreshing lift. Drizzle it over a crisp vegetable medley for a burst of Japanese-inspired freshness.

Also Read: What is Sashimi Salad and How to Make

Sum Up

In a world where salads often play it safe, Japanese dressings emerge as culinary superheroes, adding a symphony of flavors to your greens. From the umami-rich Sesame Miso to the zesty Ginger Carrot, these dressings promise a journey of taste that transcends the ordinary. Elevate your salad game with these Japanese delights, turning every meal into a celebration of fusion, tradition, and sheer deliciousness. Say goodbye to salad monotony; a world of flavor awaits!

Japanese Beef Stew Recipe: Crafting Comfort in Every Bite

Japanese Beef Stew Recipe

Embarking on a culinary journey often leads me to unexpected delights, and in the realm of Japanese cuisine, the unassuming yet deeply satisfying Japanese beef stew stands as a testament to this gastronomic adventure. While sushi and ramen often take the spotlight, this hearty stew beckons with its rich flavors, tender meat, and a symphony of carefully crafted ingredients. Join me as I uncover the artistry behind the creation of the perfect Japanese beef stew, a dish that transcends cultural boundaries and invites warmth and comfort into my kitchen. It’s a celebration of simplicity, a canvas painted with savory notes that captivate the senses and evoke the essence of home-cooked goodness in the heart of Japan.

Japanese Beef Stew Ingredients:

  • Beef: Begin with approximately 1.5 pounds of beef stew meat, preferably cut into bite-sized chunks. The marbling of the meat plays a crucial role in imparting flavor and tenderness.
  • Vegetables: Gather an assortment of vegetables such as carrots, potatoes, onions, and mushrooms. These ingredients not only add depth to the stew but also contribute to its wholesome character.
  • Broth: The soul of any stew lies in its broth. Create a savory base by combining beef broth, soy sauce, mirin, and sake. This blend forms the foundation for the stew’s umami-filled profile.
  • Aromatics: Enhance the fragrance with garlic and ginger, finely minced to infuse the stew with subtle yet aromatic undertones.
  • Thickening Agent: A touch of flour or cornstarch will help thicken the stew, creating a luscious consistency that clings to each ingredient.

Instructions

Preparation:

To commence the culinary adventure, carefully pat dry approximately 1.5 pounds of beef stew meat with paper towels. This step is essential for a better sear and flavor retention during the cooking process. Generously season the beef chunks with salt and pepper, enhancing both taste and texture. Heat a pot or Dutch oven over medium-high heat, add a dash of oil, and sear the beef chunks until they achieve a glorious golden-brown color. This initial searing not only locks in the juices but also forms a savory crust on the meat.

Building Flavor:

After searing the beef, introduce minced garlic and ginger to the pot. Allow these aromatic ingredients to sauté briefly, releasing their enticing essence. Next, add an assortment of vegetables such as carrots, potatoes, onions, and mushrooms to the pot. Sauté the vegetables until they gracefully soften, absorbing the rich flavors from the beef, garlic, and ginger.

Creating the Broth:

Pour approximately 4 cups of beef broth into the pot, creating a lush foundation for the stew. Enhance the broth by adding 2 tablespoons each of mirin, sake, and soy sauce. Bring the mixture to a gentle boil, allowing the flavors to meld into a symphony of tastes. Mirin, sake, and soy sauce contribute sweetness, depth, and saltiness to the broth, creating a well-rounded base.

Simmering Perfection:

Once the broth reaches a gentle boil, lower the heat to a simmer. Cover the pot and let the stew simmer for about 1.5 to 2 hours. This slow-cooking process transforms the beef into tender morsels and allows the vegetables to absorb the robust flavors of the broth. The result is a harmonious blend of textures and tastes.

Thickening the Stew:

Once the beef and vegetables reach fork-tender perfection, create a slurry by mixing 2 tablespoons of flour or cornstarch with water until smooth. Gently stir the slurry into the stew, allowing it to thicken to the desired velvety consistency. Continuous stirring ensures an even distribution of the thickening agent.

Finishing Touch:

Taste the stew and adjust the seasoning to your preference. Add salt and pepper as needed. Serve the Japanese beef stew piping hot, garnishing it with fresh herbs such as parsley or scallions. These final touches not only add a burst of color but also introduce a touch of freshness to the finished dish, completing the culinary masterpiece. Enjoy the complex flavors and comforting warmth of this Japanese beef stew!

Also Read: How to Make Japanese Beef Curry

Bottom Line

In the tapestry of Japanese culinary wonders, the Japanese beef stew emerges as a flavorful masterpiece, inviting me to savor the art of simplicity and the comforting embrace of a well-crafted dish. Let the rich broth, tender meat, and harmonious blend of ingredients transport you to a realm where every spoonful whispers the essence of home-cooked goodness.

SANRAKU @ All Rights Reserved.