How To Make Kitsune Udon? Recipe And Tips

How To Make Kitsune Udon Recipe

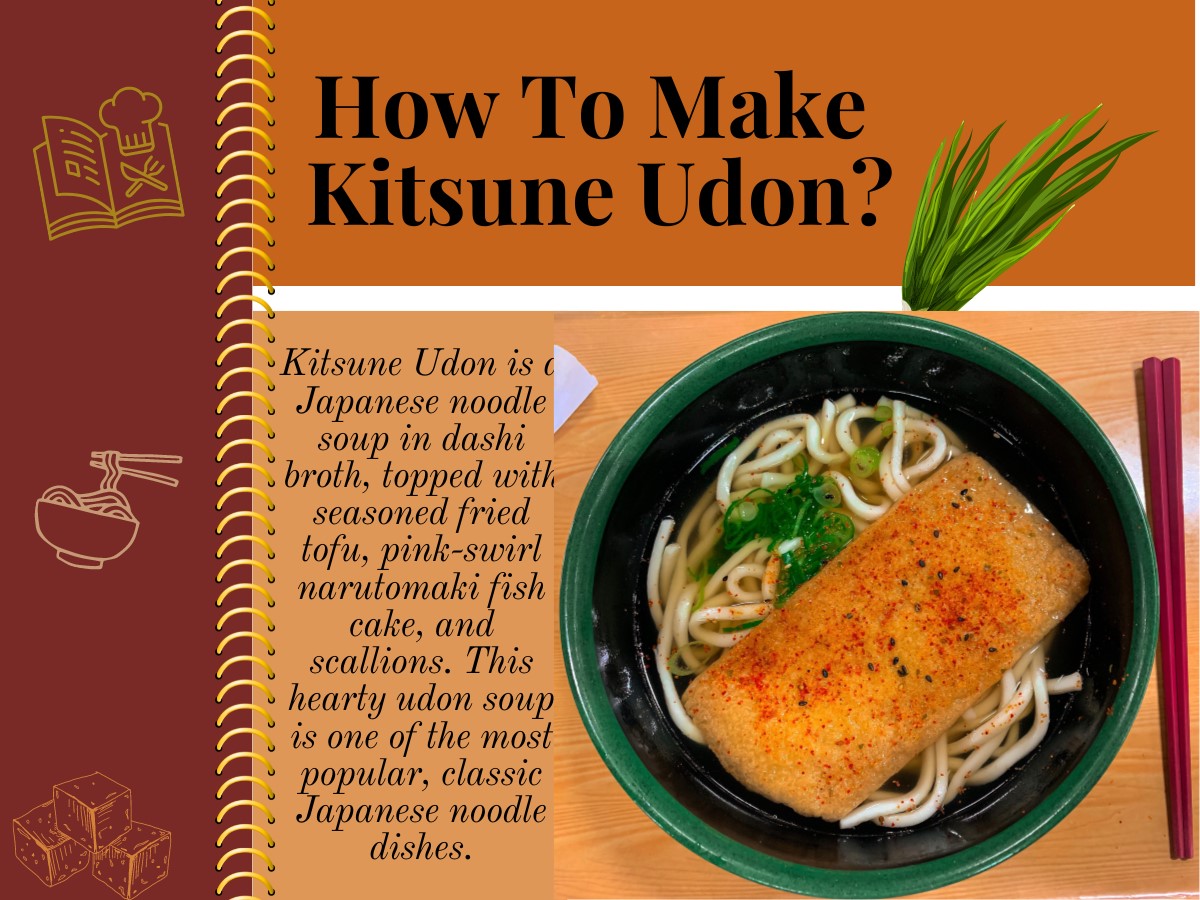
Kitsune udon is a classic Japanese meal comprising a warming and soothing udon noodle soup. It is topped with fried tofu and narutomaki fish cake, perfectly seasoned with soy sauce, mirin, umami-rich dashi, and shichimi togarashi, a special Japanese spice mix. In this Kitsune udon recipe, the simmering hot broth, crispy fried tofu, and chewy noodles all blend to make an incredibly delectable and satiating meal. Indeed, it’s best for breakfast, lunch, dinner, and supper. You can have it in summer as well as in winter to reinvigorate your body and soul. The following Kitsune udon recipe concerns “How to Make Kitsune Udon?”, its nutritional value, and serving options; you must try it.

Table of Contents:

  1. What is Kitsune Udon?
  2. Is Kitsune Udon Healthy?
  3. Nutritional Value of Kitsune Udon
  4. Is Kitsune Udon Vegan?
  5. Key Ingredients of Kitsune Udon
  6. How to Make Kitsune Udon?
    1. Ingredients
    2. Step-by-Step Recipe
  7. How to Serve Kitsune Udon?
  8. FAQs
  9. Wrapping Up

What is Kitsune Udon?

Kitsune literally means fox, which is why this noodle soup is called “fox udon,” according to obsolete Japanese theories. One claims that since deep-fried tofu was the preferred diet of the fox in their folktales, some early people began referring to it as kitsune. Still, another theory says that the color of aburaage was similar to the fox color; hence this dish was named kitsune udon.

Kitsune udon is an Udon noodle soup made with umami-rich dashi, delicious fried tofu, and pink-swirl narutomaki fish cake. The chewy-gooey udon noodles perfectly pair with crunchy aburaage and balmy soup. You can have this delectable meal in any Japanese restaurant and cook it yourself following the Chef-secret kitsune udon recipe and tips.

Is Kitsune Udon Healthy?

Yes, kitsune udon is a nourishing and reinvigorating meal since it’s a blend of whole-wheat udon noodles, dashi stock, narutomaki fish, and protein-rich tofu. Since the hero of the meal is deep-fried tofu, you must know how healthy the tofu is. It is made by coagulating soy milk, a rich protein source that contains all nine essential amino acids the human body cannot naturally forge. Moreover, tofu contains numerous minerals and vitamins vital to normal human functioning. In addition, dashi, which is a blend of dried bonito flakes and kelp, is hearty and wholesome.

Narutomaki fish cake with pink swirl, one of the traditional toppings of kitsune udon, is also a healthy and nutritive component. It is enriched with proteins and contains a very low proportion of carbohydrates and no fats. Moreover, you only get less than seventy calories per narutomaki fish cake serving. Also, whole-wheat udon noodles are rich in dietary fiber and contain less proportion of simple carbs and a negligible amount of fats. Therefore, these are easy to digest and are low on the stomach.

It’s crucial to know that udon noodles are healthy as soon as you keep them in an agreeable portion and balance them conscientiously with proteins. You can choose the proteins depending on whether you want vegan-style kitsune udon or a non-vegan kitsune udon meal. In a nutshell, add katsuobushi for a non-vegan style and kombu with or without shiitake mushrooms to get plant-based proteins.

Nutritional Value of Kitsune Udon

The statistics regarding kitsune udon’s nutritional information is listed below. Moreover, the portion size of nutritional components is calculated per serving.

Nutritional Components Amount per serving
Protein 17.31 grams
Total Fats 10.9 grams
Total Carbohydrates 68.24 grams
Sodium 2754.7 milligrams
Potassium 243.66 milligrams
Magnesium 82.4 milligrams
Calcium 123.4 milligrams
Phosphorus 206.1 milligrams
Copper 0.18 milligrams
Manganese 0.73 milligrams
Iron 2.47 milligrams
Zinc 1.37 milligrams
Chromium 2,38 micrograms
Molybdenum 5.68 micrograms
Selenium 4.81 micrograms

Is Kitsune Udon Vegan?

Yes, kitsune udon can be vegan. However, traditionally it is made with dried bonito flakes, a fish. You can make kitsune udon vegan by replacing katsuobushi (dried bonito flakes) with kombu, edible kelp. Moreover, adding stir-fried vegetables and shichimi togarashi can balance the savoriness and umami flavor of vegan kitsune udon. It’s crucial to add plant-based protein sources to your meal to counterbalance the benefits of udon noodles.

Key Ingredients of Kitsune Udon

Dashi Stock

A toothsome and warming dashi stock is the main element of kitsune udon. It can be produced from scratch, dashi instant powder, and packets. Nevertheless, the most nourishing and healthy method is to make your dashi stock from scratch. It will only take about 20 minutes. Moreover, you can prepare dashi soup from a dashi packet containing all the dried ingredients. However, you should not prefer instant dashi powder since it will not make your meal delectable and nutritive.

Aburaage

Aburaage, the deep-fried tofu pouch, is available in Japanese or Asian stores. So you can buy them from the market and prepare them at home. Remember that homemade foods are more delicious and healthy since they are devoid of preservatives, artificial flavors, and chemicals.

Udon Noodles

Since udon noodles are highly well-liked outside of Japan, anyone living elsewhere can still get them from Asian markets. There are wide varieties of noodles, but udon noodles perfectly balance the umami flavor and savoriness of kitsune udon.

How to Make Kitsune Udon?

Do you want to make kitsune udon like a Pro enriched with savoriness and aroma? Try this recipe to get a mouthwatering and nutritious meal.

Ingredients

For Kitsune Udon Noodles:

Udon noodles Two packets; 180 grams
Inari age (seasoned and fried tofu 4
Narutomaki fish cakes 4
Green onions 1
Shichimi togarashi As required

For Homemade Dashi Recipe:

Water 2 ½ cups
Katsuobushi (dried bonito flakes) 1 ½ cups
Kombu (dried kelp; seaweed) 1

For Soup Broth

Dashi Soup Stock 2 ½ cups
Usukuchi Soy sauce one tablespoon
Mirin one tablespoon
Sugar One teaspoon
Kosher salt ½ teaspoon

Step-by-Step Kitsune Udon Recipe:

  • Gather all ingredients for a mess-free cooking experience.
  • Firstly, to make homemade dashi stock, soak the kombu in the water for about half an hour. You can also soak this kelp for half a day before cooking. Nevertheless, if you wish to make it right away, put the kombu in the water and simmer it for 15-30minutes but do not reach boiling. Remove the kombu, and your vegan dashi stock is ready. For the non-vegan recipe, after removing the kombu, add katsuobushi and boil it. After boiling, let the stock simmer for another 15 minutes. Then, strain the stock, and it is ready to use.
  • For a soup broth, take a large pot and add prepared dashi stock. Then, add mirin, soy sauce, sugar, and kosher salt. Bring it to a boil, turn off the flame and let it simmer for five minutes with the lid on.
  • For udon noodles, take a large pot and add water. Add the cake of frozen udon noodles and boil them in hot water for about a minute. Strain them and put them in a bowl for later use. You can also use dry noodles and follow the labeled steps to cook them accurately.
  • Lastly, prepare the garnishings. Finely chop fresh green onions and cut narutomaki fish cake into thin slant slices. Firmly press the aburaage to squeeze out excess moisture. Season the tofu and fry them to golden brown perfection.
  • Put the dashi stock soup in a bowl, aburaage, narutomaki fish cake slices, and udon noodles. Then dip a sauce over them and add shichimi togarashi for extra savoriness and spice. Serve it hot.

How to Serve Kitsune Udon?

You can serve kitsune udon with deep-fried tofu and narutomaki fish. Moreover, season it with soy sauce and shichimi togarashi to get a perfect blend of flavors. Serve it hot, and enjoy the hearty noodle soup.

FAQs

What is Udon?

The term “Udon” is used for Japanese noodles made of whole wheat with a glossy white appearance and mild flavor. These are the star ingredients of many Japanese meals, such as Kitsune udon, tempura udon, Kake udon, tonkatsu udon, and nabe yaki udon. Moreover, udon noodles are most loved when served with dashi stock, poached eggs, fried tofu, seafood, and soy sauce.

What Does Kitsune Udon Taste Like?

Kitsune udon has a rich umami and savory flavor, which is balanced with the mild flavor of udon noodles and the sweetness of tofu.

How to Store Kitsune Udon?

Kitsune udon can last in the refrigerator for about three days. Since the recipe contains fish, it is advisable to consume it fresh and as soon as possible. Store the package in an air-tight container to prevent it from getting soggy and moist.

Wrapping Up

Kitsune udon is a nutritive classical Japanese delicacy made with umami-rich dashi soup, mildly flavored udon noodles, and seasoned deep-fried tofu. The savoriness of the dish is enhanced with the Japanese spice mix and dipping sauces. For an authentic kitsune udon recipe and its nutritional value, refer to the above content.

Also Read: How Healthy Is Agedashi Tofu? Nutritional Facts and Recipe

How Healthy Is Agedashi Tofu? Nutritional Facts and Recipe

How Healthy Is Agedashi Tofu? Nutritional Facts and Recipe

Agedashi Tofu Recipe and Nutritional Facts

In a classic Japanese Agedashi, tofu is deep-fried to crispy, golden brown perfection and soaked in a simmering hot dashi stock. The crunchy outside and the pillowy inside of the tofu bites create an impeccable blend with an umami-rich katsuobushi dashi. Typically the broiling broth of Agedashi tofu is made with dried bonito flakes and kelp. Nevertheless, you can make it vegan by replacing dried and smoked fish with shiitake mushrooms. Since the Agedashi tofu recipe involves deep frying, many people are concerned about “how healthy is Agedashi tofu?” The following description explains the nutritional value of Agedsahi tofu and how you can make it healthy, vegan, and non-vegan.

Table of Contents:

  1. What is Agedashi Tofu?
  2. How Healthy Is Agedashi Tofu?
  3. Nutritional Facts and Values
  4. Is Agedashi Tofu Vegan?
  5. How Can You Make Agedashi Tofu?
    1. Ingredients
    2. Step-by-Step Recipe
  6. Tips to Make Perfect and Healthy Agedashi Tofu
  7. Best Toppings for Agedashi Tofu
  8. Best Side dishes for Agedashi Tofu
  9. FAQs
  10. Wrapping Up

What is Agedashi Tofu?

Agedashi tofu is a classical Japanese dish that is not only scrumptiously delectable but also highly nutritious. In this recipe, the crunchy and crispy tofu that is chewy and silky inside is soaked in a sizzling and simmering hot dashi soup. The soup is typically made with Katsuobushi, dashi, kelp, soy sauce, mirin, salt, and pepper. Moreover, this Japanese delicacy is traditionally topped with grated daikon radish, grated ginger, shredded nori, shichimi togarashi, and soy sauce.

How Healthy Is Agedashi Tofu?

Agedashi Tofu is made from tofu coagulated from soy milk. It is a rich source of plant-based proteins comprising all nine essential amino acids a human body cannot synthesize. These include;

  1. Histidine
  2. Leucine
  3. Isoleucine
  4. Lycine
  5. Threonine
  6. Tryptophan
  7. Valine
  8. Methionine
  9. Phenylalanine

In addition to amino acids, tofu is packed with numerous vitamins and minerals. These are essential for the growth and development of the human body. Moreover, soy foods such as tofu are rich in isoflavones with numerous health benefits. These include improving cardiovascular health, preventing osteoporosis, loss of cognitive function, and hormone-dependent cancers such as ovarian cancer.

Nutritional Facts and Values

The nutritional value of Agedashi tofu contains the following nutritional elements per serving;

Nutritional component %Daily Value
Total Fat 27
Total Carbohydrates 8
Protein 24
Vitamin C 1
Vitamin E 29
Vitamin B1 5
Vitamin B2 5
Vitamin B3 4
Vitamin B5 2
Vitamin B6 4
Folate 7
Calcium 9
Sodium 46
Potassium 4
Iron 12
Phosphorus 15
Magnesium 20
Copper 24
Manganese 46
Zinc 12
Selenium 22

Is Agedashi Tofu Vegan?

Agedashi tofu is traditionally made with a soup containing katsuobushi (dried bonito flakes). Therefore, it is a non-vegetarian dish. Nevertheless, you make it vegan by replacing dried bonito flakes with shiitake mushrooms. You can add many different vegetables, noodles, spices, and sauces to accentuate this classic meal’s savoriness and umami flavor.

How Can You Make Agedashi Tofu?

Here is the step-by-step recipe to make Agedashi tofu

Ingredients

For Deep-frying Tofu:

Tofu (medium to extra-firm) 2 lbs.
All-purpose flour As required
Oil (without flavor and aroma) As required
Ginger (freshly grated) 2 inches
Scallions (sliced) 2
Nori seaweed As required

 To make Sauce:

Katsuobushi Dashi 25 oz.
Soy sauce 3 fl. oz
Mirin 5 fl. oz
Arrowroot powder 3 teaspoons
Water 2 tablespoons

To make Dashi:

Water 4 cups
Kombu seaweed 10 grams
Dried bonito flakes 10 grams

Step-by-Step Agedashi Tofu Recipe:

  • Firstly prepare dashi stock by adding kombu in the required amount of water and simmer it. Without bringing the water to a boil, remove the kombu and add dried bonito flakes and boil. After boiling, steep it for about 10 minutes. Strain the flakes (katsuobushi) from the dashi stock and put the stock aside.
  • Using a paper towel, press and pat dry the moisture from the tofu as much as possible. You can do pressing and drying for about 15-30 minutes, depending on the texture of the tofu.
  • You can make the sauce by combining all the sauce ingredients till your tofu is drying.
  • Cut the tofu into blocks of about 2 inches. Then, coat the tofu in the flour or potato starch before deep-frying.
  • Preheat the oil to about 170 degrees Celcius, put the coated tofu in the oil, and deep fry them for about two minutes from each side.
  • Finally, pour dashi stock into a bowl, add deep-fried tofu, and garnish it with grated daikon radish, ginger, and green spring onions. Moreover, drip the sauce over it, and there you go, a classic Agedashi tofu meal is waiting for you.

Tips to Make Perfect and Healthy Agedashi Tofu

The following are the Pro tips to make Agedsahi tofu crispy, crunchy, grease-free, and healthy.

1.    Removing Moisture

Since tofu is made by coagulating proteins in soy milk, it may retain moisture. Different tofu varieties with varying firmness and wetting level are available such as silky soft, moderately firm, and extra-firm tofu. Therefore, opt for the extra firm variety when you intend to deep-fry tofu. Nevertheless, you may need to press it hard before frying to remove any little moisture that may be present. Similarly, if you have medium tofu, press and drain its liquid for about 15 minutes. It’s the optimal duration; exceeding this time may not result in harder than soft tofu inside.

2.    Deep-fry at Low-Temperature

Tofu should be deep-fried at a low temperature, between 160 and 170 degrees Celsius, since it is moist and contains a lot of liquid.

3.    Don’t Overcrowd the Pan

Do not overcrowd the pan and deep-fry the number of tofu pieces that can perfectly fit the dimensions of your pan. Moreover, leave some space to toss tofu easily without breaking it.

4.    Use a Non-stick Pan

Prefer a non-stick pan so that your tofu does not fall apart or stick to the bottom of the pan. It is because beautifully shaped tofu cubes deep fried to golden brown perfection and crispiness will make your dish more appetizing and mouthwatering.

5.    Use of Potato Starch

Choose potato starch instead of corn starch because the latter is too fine to coat the tofu. Cornstarch also disappears as soon as you dip the tofu in oil for deep frying.  Moreover, remember to coat potato starch just before frying the tofu since it releases a lot of moisture, which can cause the starch to become a slurry and spoils the crisp.

Best Toppings for Agedashi Tofu

Play with the flavors and adjust the nutritional value of this classic Japanese meal by varying the toppings and sauces. You can add the following;

  • Daikon radish, finely grated
  • Chopped green onions, also known as scallions
  • Ginger, grated coarsely
  • Shittake mushrooms
  • Deep-fried lotus root bits, eggplant, shishito peppers
  • Nori, shredded
  • Shichimi togarashi; Japanese spice mix

Best Side Dishes for Agedashi Tofu

Pair up your crispy, crunchy, and chewy deep-fried tofu with;

  • Udon noodles
  • Sona noodles
  • Vegan Fried rice
  • Boiled Brown rice
  • Mie Goreng noodles
  • Salads
  • Stir-fried vegetables
  • Dipping Sauces

FAQs

What kind of Tofu Is Used For Agedashi Tofu?

Super or extra firm tofu is the best for deep frying since the variety has a little moisture and doesn’t need to be pressed before frying. You can also use moderately firm tofu but must press it hard to remove the liquid; otherwise, your tofu will fall apart.

How to Serve Agedashi Tofu?

Agedashi tofu is typically served in a sizzling hot katsuobushi soup stock. Add a variety of garnishings, such as spring onions, daikon radish, and grated ginger, to balance the sweetness and nutty flavor of tofu. Also, you can pair the dish with Udon, Soba, brown rice, and salads. Moreover, you can serve it spicy and tangy with shichimi togarashi- the ultimate Japanese spice mixture.

How to Make Agedashi Tofu Vegan?

You can make Agedashi tofu vegan by replacing dried bonito flakes (made of dried and smoked fish) with shiitake mushrooms. Moreover, you can replace other animal proteins added to the broth with plant-based proteins such as mushrooms and vegetables. For a quick vegan-style recipe, you will require silky tofu, potato starch, spring onions, soy, daikon radish, seaweed, and dashi stock. Moreover, you can deep-fry tofu with a plant-based oil such as canola.

Wrapping Up

Agedashi tofu is a healthy Japanese meal comprising deep-fried tofu served in simmering and sizzling hot dashi soup. The flavor and nutritional value of the soup can be customized by varying the variety of garnishings and side dishes. Though the iconic ingredient of the soup is katsuobushi, you can replace it with shiitake mushrooms for vegan-style. Moreover, the hero of this recipe, tofu, is the healthiest and most nourishing edible, richly packed with plant-based proteins, essential amino acids, omega-3 fatty acids, and zero cholesterol. It’s indeed the best meal you can have for a healthy lifestyle.

Also Read: How To Make Dashimaki Tamago? Japanese Rolled Omelette With Dashi Recipe

How To Make Dashimaki Tamago? Japanese Rolled Omelette With Dashi Recipe

What Is The Difference Between Nabeyaki Udon And Soba? Find Out Which One Is Healthier

Difference Between Nabeyaki Udon And Soba

Noodles are everyone’s favorite since they are a staple of almost all cultures and cuisines. There are, however, different ways to prepare noodles in different regions. Some recipes make noodles using wheat flour, rice, eggs, buckwheat, starch, and seaweed. The same is true for Japan, where popular varieties of noodles include ramen, Soba, udon, somen, shirataki, Hiyamugi, Harusame, and Tokoroten. Each of these assortments is scrumptiously delectable, nutritious, and distinctly prepared. Nevertheless, many people confuse Udon with Soba due to slight differences in appearance, thickness, and taste. If you also wonder, “what is the difference between Nabeyaki Udon and Soba” read the following description.

Nabeyaki Udon is a traditional Japanese staple food loved by all, ideally served during cool weather for a comforting supper. Forever iconic, Nabeyaki udon comprises Udon noodles soaked in a delicious and warming miso soup, served with tempura, chicken, and vegetables. In contrast, Soba is a Japanese noodle typically served with dipping sauces in the summer. However, in the winter, hot, nourishing soups bring out the warmth and taste of the dish.

Table of Contents:

  1. What Is The Difference Between Nabeyaki Udon And Soba?
  2. What is Nabeyaki Udon?
  3. Types of  Udon Dishes
  4. What is Soba?
  5. Types of Soba Dishes
  6. Udon vs. Soba; Which One is Healthy?
    1. Nutritional Value of Nabeyaki Udon
    2. Nutritional Value of Soba Noodles

What Is The Difference Between Nabeyaki Udon And Soba?


Characteristics Udon Noodles Soba Noodles
Type of Flour Wheat flour Buckwheat flour
Color White with gloss Gryeish brown and dull looking
Taste Mild flavor that blends well with many side dishes and dipping sauces Nutty or earthy flavor which needs to be balanced when combined with other dishes such as broth
Texture Chewy and bouncy Grainy and springy
Thickness Thicker and wider than Soba; approximately ⅛ inches (3mm) thick and 4-6 mm wide Relatively less thin and wide; approximately 1/16 inches thick
Serving Served with miso soup; Nabeyaki Udon

Can be served with dipping sauces

Mostly served with dipping sauces

Can be served with hot soups

What is Nabeyaki Udon?

Nabeyaki Udon is a classical Japanese dish serving udon noodles with miso soup or dashi stock. It also contains poached eggs, tempura, chicken, kamaboko, dried shiitake mushrooms, spinach, scallions, green onions, and carrots. Udon noodles being mild in flavor, combines well with almost every nutritious and delectable eatable. The following are the types of dishes you can prepare using udon noodles.

Types of  Udon Dishes

Try the following Japanese dishes and indulge in the goodness of udon.

Kake Udon

Kake udon is the most basic Japanese dish made with glossy udon noodles and luscious kakejiru. Kakejiru is a warming soup stock containing dashi, soy sauce, mirin, and other condiments, garnished with fresh green onions and ginger for an appetizing aroma. Moreover, Kake udon combines numerous additional ingredients and toothsome side dishes to create a palatable main course meal.

Yaki Udon

Yaki udon is a classical stir-fried dish popular in Japan in which udon noodles are stir-fried with pork and various vegetables. Yaki udon infuses the savoriness and umami flavor of mirin and soy to serve you a slurp-worthy nutritious udon meal. Moreover, the frying technique is known as Yakisoba, which is why the dish is named Yaki udon.

Tanuki Udon

Tanuki udon is a soup dish made with udon noodles soaked in an umami-rich dashi soup or broth and topped with crispy bits of tempura (tenkasu). You can savor your taste buds more by adding seaweed or slices of cured surimi. Moreover, this Japanese delicacy is super refreshing and revitalizing, best for summer dinners.

Kitsune Udon

Kitsune udon is the ultimate Japanese comfort food made with a simmering hot dashi soup, udon noodles, fried tofu, fish cake, and scallions. You can add different sauces and condiments to balance your choice’s umami and savory flavor. Make it meaty or veggie; everyone will still love it.

Curry Udon

Curry udon, as the name indicates, is prepared with udon noodles cooked in a special Japanese curry. You can make curry using any kind of protein, vegetables, and condiments. Moreover, you can add dashi soup stock or Japanese curry roux.

Stamina Udon

Stamina udon is a Japanese noodle dish with various proteins such as chicken, pork, fish, shrimp, raw eggs, and many vegetables. As the name indicates, this udon dish is known to increase the vigor and stamina of regular consumers.

Tempura Udon

This flavorful hot soup dish features chunks of deep-fried shrimp (tempura) or stir-fried veggies together with glossy white Udon noodles. The hearty blend of mirin, soy sauce, and black pepper brings the exotic balance of savoriness and umami flavor to this Japanese delicacy.

Zara Udon

When soups are hard to get in restaurants during the summer, Zara udon is the ideal cold broth meal to satisfy your hunger and satiety needs. It is prepared with a cold metsuyu soup base soaked in udon noodles with a mild flavoring. Daikon radish, wasabi paste, and nori sheets are used as garnishes.

What is Soba?

Soba noodles- the classical Japanese staple food made with unleavened dough from buckwheat flour are highly nutritious with a nutty flavor and a grainy texture. These are thin than udon noodles and resemble spaghetti ( made of whole wheat flour).

Types of Soba Dishes

You can make the following soba dishes with soba noodles.

Zaru Soba

Zaru soba is a Japanese delicacy with chilled soba noodles, assorted dipping sauces, and garnishings. This cool and refreshing meal is the best to have on bright sunny days when you are thirsty and hungry at the same time.

Kake Soba

Kake soba is a festive special meal that the Japanese love to cook and serve on New Years’ eve. It is a warming and cozy meal prepared by soaking nutritious soba noodles in a simmering hot broth. The broth is usually made with dried bonito flakes, kelp, and umami–rich dashi stock.

Yaki Soba

Yaki soba is prepared in various street-style foods by combining the savory flavor of stir-fried soba noodles with different proteins, veggies, and sauces. Moreover, yaki soba is best served with a tangy and umami Worcestershire sauce.

Tempura Soba

In this recipe, the nutty and earthy flavors of soba noodles are combined and balanced with the sweet and sour savoriness of tempura. People usually love how tiger prawns blend toothsomely with the nutty and grainy soba noodles; you can still pick tofu tempura or aubergine varieties.

Tsukimi Soba

Tuskimi soba is made by pouring creamy and umami-rich dashi soup over the nutty soba noodles. Balancing the heat of condiments with sweet carrots and green onions is a good solution for the smart infusion. Moreover, the hero of Tsukimi soba is a fried egg topped with noodles.

Kitsune Soba

With kitsune soba, you may scrumptiously satiate your late-night cravings. Just prepare and pour a dried kelp broth over the nutty soba noodles and garnish it with tofu, green onions, and scallions. Enjoy the luscious meal.

Oroshi Soba

Being aromatically toothsome and relishing, Oroshi soba soup is the coziest supper meal. Make a stand-out broth with dried bonito flakes, kelp, daikon radish, ginger, green onions, and exotic shiitake mushrooms.

Yamkake Soba

Yamakake Soba offers all the coziness you need to heat a frigid winter eve with its basic miso broth, shredded yam, a dash of leeks, and heaps of noodles.

Udon vs. Soba; Which One is Healthy?

Since soba noodles are made from unleavened dough from buckwheat flour, these are more nutritious and healthy than udon. It is because buckwheat is low in carbohydrates, so people on a diet should prefer soba noodles. Moreover, buckwheat is gluten-free, so people with a gluten allergy can safely consume soba. This comparison does not mean that udon noodles are not safe and healthy; rather, these carbs are difficult to eliminate and do not fulfill satiety value. Furthermore, you can have udon noodles when you want something light and more refreshing.

Nutritional Value of Nabeyaki Udon:

A meal of Nabeyaki udon containing these ingredients comprises the following nutritional components.

  • 4 oz Chicken
  • 120 grams fish cakes
  • 1 large egg
  • ⅛ cup chopped broccoli
  • 2 large pieces tempura
  • 1 serving udon noodles
Nutritional Components Amount per Serving
Carbohydrates 527.52 grams
Protein 66.88 grams
Fat 34.85 grams
Fibre 1.6 grams
Sodium 1163 milligrams
Potassium 877

Nutritional Value of Soba Noodles:

Nutritional Component Amount/% OF RDI
Carbohydrates 42 grams
Protein 8 grams
Fiber 3 grams
Fat 0 grams
Sodium 0% of RDI
Magnesium 14 % of RDI
Manganese 37 % of RDI
Copper 7 % of RDI
Iron 9 % of RDI
Vitamin B3 9 % of RDI
Vitamin B1 18 % of RDI

Also Read: The Chef’s Tutorial for The Perfect Miso Soup Recipe

The Chef’s Tutorial for The Perfect Miso Soup Recipe

How To Make Chicken Katsu? Recipe And Tips

How To Make Chicken Katsu Recipe

Are you the one who always craves fried foods and snacks at night? Do you love to indulge in the scrumptiousness of crusty appetizers that are juicy and tender inside? How about making chicken katsu and storing it well so you can have it anytime you yearn? Indeed, chicken katsu is a dish you can have for breakfast, lunch, or dinner or as an appetizer, snack, side dish, or comfort food. Moreover, if you are a health freak, you can bake chicken katsu instead of deep-frying it. If you want to make chicken katsu at home and store it for later use, read the following description. It explains the original recipe, expert tips, and nutritional value of chicken katsu. Follow along.

Table of Contents:

  1. What is Chicken Katsu?
  2. Is Chicken Katsu Healthy?
    1. Nutritional Value of Chicken Katsu
  3. How To Make Chicken Katsu?
    1. Ingredients
    2. Supplies You’ll Need
    3. Step-by-step Recipe:
  4. How to Serve Chicken Katsu?
  5. How to Store Chicken Katsu?
  6. Pro Tips to Make the Best Chicken Katsu
  7. How to Perfectly Deep Fry Chicken Katsu?
  8. FAQs
  9. Wrapping Up

What Is Chicken Katsu?

Katsu in Japanese means cutlets, so chicken katsu are chicken cutlets. Many people confuse katsu with tonkatsu; however, the latter is the cutlets made of pork( Ton=Pork). It is a classic Japanese meal comprising golden brown and crispy chicken cutlets that are juicy and tender inside. These are served with katsu/tonkatsu sauce and a cabbage salad. Though the original recipe says to deep fry chicken breasts, you can bake them to control the fat intake. It is because baking will require less oil. Nevertheless, following the professional tips for deep frying mentioned below, you can still fry katsu with no grease and oil dripping.

Is Chicken Katsu Healthy?

Chicken katsu is high in calories since it is traditionally fried food. You can bake it to lower the fat level. Therefore, we cannot say it is healthy and good for all. Especially people with heart diseases, obesity, and hyperlipidemia should avoid such high-caloric meals. If it’s your cheat day, you can surely have a piece. Additionally, you can consume chicken katsu along with a vegetable salad to expedite the process of detoxification.

Nutritional Value Of Chicken Katsu

One chicken katsu weighing around 137 grams contains the following nutrition:

Nutritional Component Amount % Daily Value
Total Carbohydrates 23 grams 8
Total Fat 11 grams 17
Protein 32
Sodium 281 milligrams 12
Potassium 297 milligrams 8
Calcium 7
Vitamin A 2
Vitamin C 0

How To Make Chicken Katsu?

Here’s the original recipe to make Japan’s special Chicken Katsu. It is an easy recipe with no tricky cooking techniques. All the ingredients and kitchen supplies required in this recipe are easily available from the market. Moreover, the total cooking time is just 30 minutes; 20 minutes for preparation and 10 minutes for cooking.

Ingredients

For Cooking:

Ingredients Quantity
Boneless chicken breast 1
Egg 1 (large)
Vegetable oil (neutral-flavored) ½ tablespoon for egg and 3 cups for deep-frying
All-purpose flour 3 tablespoons
Japanese panko breadcrumbs 1 cup
Kosher salt ½ teaspoon
Black pepper (Freshly Ground; it will enhance the savoriness) ⅛ teaspoon

For Serving:

  • Shredded cabbage or daikon radish
  • katsu/tonkatsu sauce
  • Japanese sesame dressing (optional)

Supplies You’ll Need

  • A sharp Chef knife for the Kannon Biraki cutting technique
  • Medium-sized dishes/trays (to dip chicken breast easily) for egg mixture, flour, and panko breadcrumbs
  • Medium-sized pot or skillet required for deep frying
  • Kitchen thermometer
  • Chopsticks
  • Meat mallet or hammer
  • Sieve
  • Whisk
  • Wire rack
  • Paper towel
  • Serving plate

Step-By-Step Recipe:

  • Gather all ingredients for a non-messy and stress-free cooking experience.
  • Cut the chicken breasts into a butterfly shape or, using the Kannon Biraki cutting technique, into a French door shape.
  • For the latter technique, cut the chicken breast from the center through its thickness but not all way down. Tilt the knife to either side, scoring the breast to make a wing/door. For a second wing/door, repeat slicing from the middle and sliding to the opposite side.
  • Then, using a meat mallet, flatten the breast slices to about half an inch of thickness.
  • Season the breasts evenly with salt and pepper. Meanwhile, when your chicken is marinating, add oil to the pot or skillet to about half an inch. Heat it at medium to low flame till the oil reaches 170 degrees Celsius. Use a kitchen thermometer to check the optimal oil temperature.
  • Prepare the egg mixture and add flour and panko breadcrumbs in three separate dishes or trays. Coat the marinated chicken breasts in flour and dust off any excess. Then, dip the breast piece in the egg mixture. Lastly, coat Japanese panko breadcrumbs on the chicken breasts. Firmly press the surface to stick maximum crumbs. Then, dust off any excess.
  • Add one or two coated chicken breasts in your pot or skillet, depending on its size. Rember not to overcrowd the pan, or it will affect the frying results. Deep fry each piece for about three minutes until tender and golden brown.
  • Remove the fried pieces from the oil, drain any excess oil, or put it on a wire rack above a bowl to collect excess oil. Moreover, remove fallen breadcrumbs from the pot/skillet using a sieve to avoid burning and ruining other batches. You can also make katsu/tonkatsu sauce meanwhile your chicken is frying. The recipe for katsu sauce is mentioned in the FAQs section.
  • Once cooled, serve it as mentioned below.

How To Serve Chicken Katsu?

To lower the temperature of chicken katsu after deep-frying, let it sit for a while. Then, serve it as a whole piece or cut it into 1 inches strips. You can drip Katsu/Tonkatsu sauce over the chicken katsu strips to eat it as an appetizer. However, you can pair it with a side dish to make it a main course meal. Serve it with shredded cabbage or daikon radish as a salad dressing. Check the FAQs section to learn how to make tonkatsu sauce.

How To Store Chicken Katsu?

Wrap the individual chicken katsu pieces in plastic food wrap or aluminum foil. Then, pack it in an air-tight container or a freezer/ziplock bag. Store it for about three days in the refrigerator and freezer for up to three to five weeks. Before eating it next time, thaw it in the refrigerator overnight. Then, reheat for about 15 minutes in an oven or toaster at 180 degrees Celsius. Moreover, reheat it for half an hour if you intend to eat it without thawing.

Pro Tips To Make The Best Chicken Katsu

Always remember these Chef-secret tips to cook chicken katsu like a Pro.

Kannon Biraki and Sogigiri Cutting Technique

Chicken breasts are typically thick from the center, usually, about one inch, so frying and cooking them can be challenging. Thick chicken breasts are often left uncooked from the inside. Therefore, chicken breasts are cut in a butterfly shape and are hammered afterwards. In Japan, chefs recommend cutting chicken breasts using the Kannon Biraki technique. According to this technique, chicken breasts are cut from the middle and slide to the left. Similarly, again cutting it from the middle and sliding the cut to the right so it looks like a French door.

If one wants to consume the bite-size pieces, the chicken breasts are cut at a slant angle into cubes. This type of cutting technique is known as Sogigiri, which increases the surface area of chicken pieces to help them cook well. Moreover, these cuts make the meat more flavorful and enriched with the savoriness of condiments. You can follow the Sogigiri cutting technique to get the bite-sized pieces perfectly cooked and savored if you make katsu with pork, known as tonkatsu.

Get the Original Panko Breadcrumbs

To enjoy the ultra-crunchy and super-crispy chicken katsu; you must have the original Japanese Panko breadcrumbs. These crumbs are quite different from the regular ones. Because the original is lighter and crustier and gets a perfect golden brown hue pon frying.

Add Oil or Milk to the Egg Mixture

Add a teaspoon of oil to the egg mixture to help it stick to the chicken breasts and flour. Some people add milk to make the egg mixture runny and coatable. Isn’t it a Chef’s secret?

Dust off excess Panko/Flour

Dust off the surplus flour from the chicken breasts to avoid separating the top coats during frying. Also, firmly stick the Panko breadcrumbs to the chicken to prevent them from falling into the hot oil.

How To Perfectly Deep Fry Chicken Katsu?

Deep frying foods is tricky since it dictates how perfectly you golden brown the outside crisp and optimally cook the inside. Moreover, a perfectly fried chicken katsu is not dripping oil or greasy rather, it is crispy outside and tender inside. Therefore, to fry chicken katsu like a Pro, follow the below-mentioned tips.

  • The temperature of the oil for deep frying should be optimal. It should be around 170 degrees Celsius. To check the temperature, you will need a kitchen or instant thermometer. Use it carefully to avoid oil splashes on you.
  • Use a medium-sized pot to add enough oil (approximately up to 1.5 inches) to help deep fry chicken katsu. Moreover, the dimensions of your pot should accommodate the whole piece of chicken katsu, so it doesn’t break irregularly. After frying, you can make perfect slices or strips using a sharp knife. I recommend a pot of at least 20 centimeters in diameter.
  • When frying chicken katsu, remove the fallen bread crumbs from the oil. Otherwise, these will burn, making the other pieces unpresentably dark or messy.
  • Do not change the flame when there’s no need.

FAQs

How Long Does Chicken Kastu Last?

Chicken katsu can last for about two to three days in the refrigerator and freezer for up to three to five weeks. Before consumption, you can reheat chicken katsu in an oven or toaster to enjoy the crispy hot chicken katsu next time. Do not prefer microwaves for reheating since they will ruin the crisp texture and make the cutlets overly moist.

Can You Bake Chicken Katsu?

Yes, you can bake chicken katsu if you are concerned about the fat intake since baking uses less oil. For this purpose, prepare chicken katsu by the described method, then bake it at 200 degrees celsius for about 30 minutes. To know if the katsu is properly baked, check the internal temperature, which should be around 74 degrees Celsius.

What Is The Difference Between Tonkatsu And Chicken Katsu?

The term Katsu means cutlets in Japanese, and Ton means pork. Therefore, Tonkatsu refers to cutlets made from pork. In contrast, chicken katsu are cutlets preferably made with chicken breasts for a firm texture. However, one can also use chicken leg meat, which is more flavorful and moist than dry breast meat.

How Do I Eat Chicken Katsu?

You can cut chicken katsu into thin strips, drip the katsu sauce over them, and eat alone. However, you can serve it with many side dishes, including Japanese coleslaw, soba noodles, miso soup, ramen noodles, mashed potatoes, and seasoned rice. Moreover, you can serve chicken katsu with vegetable salads comprising cucumber, daikon radish, carrots, and cabbage.

Is Chicken Katsu Served Cold?

Yes, chicken katsu is served cold or at room temperature. Although the cutlet is deep-fried, the Japanese prefer to eat it at room temperature to enjoy the inside.

How To Make Katsu Sauce?

Katsu sauce is similar to tonkatsu sauce; the two give the same taste to many people. It is commercially available in supermarkets in the Japanese condiment section. However, you can also make it at home. Combine the following ingredients:

  • one tablespoon of ketchup
  • two and a half teaspoons of Worcestershire sauce
  • one and a half teaspoons of oyster sauce
  • a pinch of sugar

You can adjust the quantity of each sauce and add seasonings according to your taste. Moreover, make it in bulk and store it in the refrigerator for about two to three weeks and freezer for up to three to four months.

Wrapping Up

Chicken Katsu is a classic Japanese dish featuring crispy golden brown cutlets that are scrumptiously juicy inside. You can deep fry or bake it to get the perfect crisp. Have it any time and pair it with various side dishes, salads, and dressings. Moreover, chicken katsu is a good source of protein and fats. You can make it healthy at home following the recipe mentioned above. Don’t forget to glance at the Pro tips to help you cook the meal properly and control oil dripping.

Also Read: The Culinarian’s Secret Onigiri Recipe (How to Make Onigiri)

The Culinarian’s Secret Onigiri Recipe (How to Make Onigiri)

How To Make Dashimaki Tamago? Japanese Rolled Omelette With Dashi Recipe

How To Make Dashimaki Tamago

Want to kick start your day with something nutritious and delicious? Are you bored of consuming eggs in traditional ways? Try Dashimaki Tamago- the ultimate Japanese recipe perfect for breakfasts and bento lunches. It is a type of Tamagoyaki but slightly different and more innovative than the typical Japanese rolled omelettes. Without a doubt, this delectable meal is highly nutritious, imbued with the goodness of eggs and Dashi. Aside from being the star of this dish, dashi is the healthiest ingredient, giving it its custardy texture and savory taste. So are you planning to make dashimaki Tamago at home? Read on since the following description explains how to make Dashimaki Tamago- the original recipe.

Table of Contents:

  1. What is Dashimaki Tamago?
  2. How Does Dashimaki Tamago Differ From Tamagoyaki?
  3. Types and Styles of Dashimaki Tamago
    1. Eastern Dashimaki Tamago
    2. Western Dashimaki Tamago
  4. Nutritional Value of Dashimaki Tamago
  5. How To Make Dashimaki Tamago?
    1. Supplies You’ll Need
      1. Choosing the Right Pan
    2. Ingredients
    3. Step-by-Step Recipe
      1. In a Tamagoyaki nabe (rectangular pan)
      2. In a round frying pan
  6. Tips to Make The Best Dashimaki Tamago
  7. Other Tamago Recipes
  8. FAQs
  9. Wrapping Up

What is Dashimaki Tamago?

Dashimaki Tamago is a Japanese rolled omelette prepared from eggs beaten and seasoned with mirin, soy sauce, salt, sugar, and dashi. Dashi is a stock, quite popular in Japanese cuisine. It is a blend of dried bonito flakes, kombu (kelp seaweed), shiitake mushrooms, and dried fish. Indeed, a perfect combination to savor the umami flavor of Japanese meals. You can have this delectable and light meal for breakfast and a side dish for lunch or dinner. The fluffy custardy omelette melts smoothly in the mouth, makes you happy, and is considered the best comfort food.

Furthermore, Dashimaki Tamago is quite easy to prepare; you only need to learn the egg-folding technique. Also, the ingredients and required kitchen supplies are easily available at the market. If you are not from Japan, you can still get the condiments from the super stores. The Japanese usually use a pan called the Tamagoyaki nabe for this recipe. The shape and size of the pan facilitate omelette folding and prepares your Dashmaki Tamago more presentable. Moreover, you can get this precise pan since it is available at many offline and online stores such as Amazon, eBay, and Walmart.

How Does Dashimaki Tamago Differ From Tamagoyaki?

Many people confuse Tamagoyaki with Dashimaki Tamago; however, the two are somewhat different yet interchangeably. Firstly, Dashimaki Tamago contains dashi, which is not necessarily included in all rolled omelettes. Moreover, dashi gives the rolled omelette a slightly liquid and soft texture. In contrast, other Japanese rolled omelettes are a bit firmer. Furthermore, the preparation technique of Dashimaki Tamago differs from that of Tamagoyaki. The former use a sushi mat which helps fold the omelette and create a mesh design on the egg surface.

Also, you can add many eatables like green onions, cheese slices, cold cuts, and spinach in Tamagoyaki, whereas Dashimaki Tamago is made only with eggs and dashi. However, in Japan, it is frequently served with daikon radish. Tamagoyaki is, in fact, a broad term for all types of rolled omelettes. These are seasoned with many optional ingredients, such as tsuyu, mirin, Worcestershire sauce, mayonnaise, and black pepper. So Dashimaki Tamago, one of its types, specifically includes dashi in a Japanese rolled omelette.

Types and Styles of Dashimaki Tamago

In Japan, eastern and western regions have different cooking styles and specialities. Sometimes, the hero ingredient and the cooking method are the same in these localities; however, some added ingredients are quite different. One example of Dashimaki Tamago is explained below.

Eastern Dashimaki Tamago

(Kanto) Eastern Dashimaki Tamago includes dashi stock, dark soy sauce, and sugar that make a sweet and toothsome Dashimaki Tamago. It has a slightly brownish appearance due to the addition of dark soy sauce. Kanto-style Dashmaki Tamago has

  • More sugar, so sweeter
  • Less dashi stock
  • Dark soy sauce, so brownish toned
  • Traditionally made in a square frying pan

Western Dashimaki Tamago

Kansai-style or Western Dashimaki Tamago is made with more dashi stock and no added sugar; that’s why it is a savory rolled omelette. Moreover, it uses mirin and a light soy sauce commercially known as usukuchi soy sauce. Due to the light-colored soy sauce, Kansai Dashimaki Tamago is more egg-like yellowish. It is preferably cooked in rectangular Tamagoyaki nabe.

Nutritional Value of Dashimaki Tamago

One serving of Dashimaki Tamago weighing around 137 grams gives the following nutrients provided that it is prepared using:

  • Two large eggs
  • 9 grams of dashi
  • ¼ teaspoon of mirin, soy sauce, sugar
  • One teaspoon oil
  • A pinch of salt
Nutritional Component Amount % Daily Value
Protein 13 grams
Total Carbohydrates 2.4 grams 1
Total Fat 14 grams 22
Cholesterol 372 milligrams 124
Sodium 391 milligrams 16
Potassium 184 milligrams 5
Calcium 6
Vitamin A 11
Vitamin C 0

How To Make Dashimaki Tamago?

The following is the general recipe for making Dashimaki Tamago, regardless of the regional differences in cooking methods viz Kanto and Kansai. You can change the type of soy sauce used, the exclusion or addition of sugar, and dashi.

Ingredients

Ingredients Quantity
Eggs 4
Dashi Stock 50 ml
Mirin 20 ml
Soy sauce ½ teaspoon
Sugar 1 teaspoon
Salt ¼ teaspoon
Daikon Radish (Optional; for serving) 1 tablespoon
Nori sheets (Optional; for round pan method) As required

Supplies You’ll Need

  • Large Bowl
  • Whisk
  • Chopsticks
  • Fork/spoon
  • Sushi mat
  • Measuring cup
  • Round or Square Frying cup (Tamagoyaki nabe)
  • Paper Towel

Choosing the Right Pan

Choosing the right pan is essential for the best results, which dictate smooth edges, perfect thickness, and evenly cooked. You can use a rectangular or round shaped pan, provided they are made of the finest quality material to prevent burning and toxicity of the food. The following are the advantages and disadvantages of using aluminium, copper, or cast iron Tomagoyaki nabe.

Material Advantages Disadvantages
Aluminum with non-stick coating ● Less Expensive

● Easy handling and use

● Light-weight

● Can get easily scratched or chipped by steel knives and spoons, so less durable

● Uneven heating may occur

Copper ● Easy washable

● Lighter than Cast Iron frying pans

● Smooth cooking and even heating

● Professionals choice

● Expensive

● Requires high-quality polishing and coating

Cast Iron ● Durable

● Makes food tasty

● Non-stick material with no coating

● Expensive

● Extensive heating time

Step-by-Step Recipe

Follow each step carefully and consider the below-mentioned tips to make a perfect Dashimaki Tamago. Whether you make a rolled omelette in  a round or rectangular Tamagoyaki pan, the following steps will be the same.

  • Gather all ingredients
  • Take a large bowl and crack four eggs. Using chopsticks, gently beat the eggs. The mixing should be done in a back-and-forth motion to break the yolks in the whites of the eggs. Do not overmix the eggs.
  • Take another medium-sized bowl and combine all your seasonings. Carefully measure the condiments to get the original flavor and texture. Mix 50 ml Dashi stock with 20 ml mirin and add ½ teaspoon soy sauce, one teaspoon sugar, and a pinch of salt.
  • Mix all the seasonings with a fork or spoon until sugar and salt dissolve. Then, combine the condiment mixture with the beaten eggs and lightly whisk again. Pour the Dashimaki Tamgo mixture into a measuring cup to help pour it into the frying pan and hold it while you are folding the omelette.
  • Follow either step depending on the type of frying pan you have.

In Rectangular Tamagoyaki Pan

  • Heat the pan and check its temperature by hovering over your hand and feeling the warmth. Additionally, you can drop a small amount of the egg mixture into the searing pan to hear it sizzle, guaranteeing the ideal temperature.
  • Take a piece of paper towel and dip it in vegetable oil till it soaks enough. Then, rub this oiled towel on the pan to grease it.
  • Pour the egg mixture into the pan and tilt it at all angles to spread a fine layer.
  • Remove any air bubbles using chopsticks. When the top of the egg mixture is still soft and slightly uncooked, start folding the omelette in a roll and slide it onto one side, preferably towards the handle.
  • Then, again, grease the pan using the oiled paper towel, spread the mixture on the pan and slightly below the cooked rolled omelette. Lightly cook it, roll it the same way, and slide it to the side. Repeat these steps, and don’t forget to lift the cooked omelette roll and spread the mixture beneath it.
  • You can heat the ingredients to brown the top surface once the mixture has been cooked into a Dashimaki Tamago.
  • Spread a sushi mat/bamboo mat, put the hot rolled omelette, and roll it. Let it stay for about five minutes.

In Round Pan

  • Heat the pan, check the temperature, and grease it using a paper towel soaked in oil.
  • Spread the egg mixture on the round pan completely. Then, release the air bubbles.
  • After the bottom layer is set and the top side is lightly cooked, add a sheet of nori to help you roll the omelette. It is optional; you can still roll the omelette without nori.
  • Repeat the steps and remember to spread the mixture beneath the cooked rolled omelette to help it roll with the subsequent layers. Lastly, roll the Dashimaki Tamago in a sushi mat and let it sit for five minutes.

How to Serve Dashimaki Tamago?

Cut the rolled omelette into half-inch slices. Put them on a serving plate. Then, grate the daikon radish and garnish your fresh Dashimaki Tamago. You can also add soy sauce on top.

How to Store Dashimaki Tamago?

You can store Dashimaki Tamago safely in the refrigerator or freezer to consume it later. Wrap each slice of rolled omelette into a plastic food wrap and put all of them in a freezer bag or air-tight container. Place and store it in the freezer for up to two weeks. For consumption afterwards, thaw this meal in the refrigerator overnight or a microwave if you are in a hurry. After microwaving, you can lightly sear it on the pan to remove unnecessary moisture.

Tips to Make The Best Dashimaki Tamago

Though Dashimaki Tamago is an easy recipe with basic ingredients that are easily accessible, rolling it is a tricky step. Indeed, no one can make a perfect rolled omelette in a single attempt. Nevertheless, you can follow these tips to get professional in no time.

  1. Mix the condiments separately and add them to the beaten eggs. Because if you add sugar and salt to the egg mixture, they will not dissolve properly. It will lead to a broken omelette surface and uneven flavor distribution.
  2. Strain the condiment mixture containing dashi stock, mirin, soy sauce, sugar, and salt. Then, add it to the eggs to get a fine and even rolled omelette.
  3. Refrain from overbeating or overmixing the eggs to retain the optimal consistency and thickness of the rolled omelette.
  4. Follow the 1:1 rule to add dashi stock to the egg mixture, which means one tablespoon for one egg. It will dictate the consistency of the pouring mixture and will help you handle and roll the omelette accurately.
  5. Preheating the pan is critical to cook the eggs, rolling, and browning them perfectly. The too-high temperature will over-brown the eggs, or the too-low will not make Dashimaki Tamgo fluffy and properly cooked.
  6. Grease the pan evenly or use a non-stick pan to avoid the egg mixture sticking  to the bottom.
  7. Use chopsticks instead of spatulas to roll the eggs perfectly.
  8. You can occasionally remove the pan from the stove if it gets too hot. But do not turn off the flame. Consistent temperature is essential for proper consistency.
  9. Remove air bubbles using chopsticks to avoid holes in the omelette.
  10. Only roll the omelette when cooked from the bottom and slightly uncooked from the top.

Other Tamagoyaki Recipes

You can also try other Tamagoyaki recipes. However, each of these recipes has a unique flavor and cooking technique.

  • Rice wrapped in a Japanese omelette called Omurice
  • Japanese eggs with spring onions called Onsen Tamago
  • Japanese egg sandwich called Tamago Sando
  • Ramen eggs called Ajitsuke Tamago

FAQs

Is Tamago Fully Cooked?

Dashimaki Tamago, or any Japanese rolled omelette (Tamagoyaki),  is a fully cooked meal since each layer of omelette is seared in the pan and rolled. Moreover, since the recipe has no fillings, it is quite obvious that it’s properly cooked.

Can You Eat Tamagoyaki Cold?

Yes, you can eat Tamagoyaki cold. In fact, it’s a meal that is served both hot and cold at any time of the day. You can eat it for breakfast or as a side dish for lunch or dinner.

What Do You Eat With Tamagoyaki?

Tamagoyaki or Dashimaki Tamago is traditionally served with daikon radish and soy sauce. However, you can eat it with any dipping sauce you like. Some people roll a slice of Dashimaki Tamago with sushi rice in nori.

How Long Can Tamagoyaki Last?

Tamagoyaki can last for about one to two days in the refrigerator or the freezer for up to two weeks. You only need to store it perfectly according to the method described above.

Is Tamagoyaki Sweet Or Savory?

Tamagoyaki is both sweet and savory. Eastern (Kanto) Dashimaki Tamago is sweeter than the western (Kansai) rolled omelette, which is more savory. It depends on the amount of sugar or dashi stock you add. The more the dashi, the more it is umami.

Is Atsuyaki the Same as Dashimaki Tamago?

The two recipes are different in texture. Atsuyaki Tamago (grilled rolled omelette) is thicker than Dashimaki Tamago since the former contains dash stock, giving it a silky and softer texture. In contrast, the latter has a firmer and dense consistency.

Wrapping Up

Dashimaki Tamago is the most healthy omelette for breakfast to kick start your morning energetically. It is an easy recipe which only requires a little practice in rolling the omelette. You can follow the above step-by-step recipe for making Dashimaki Tamago in a Tamagoyaki nabe or round frying pan. Moreover, follow our tips to cook the perfect Japanese rolled omelette.