Must Try The Master Chef’s Japanese Curry Recipe For A Healthy Meal

Japanese Curry Recipe

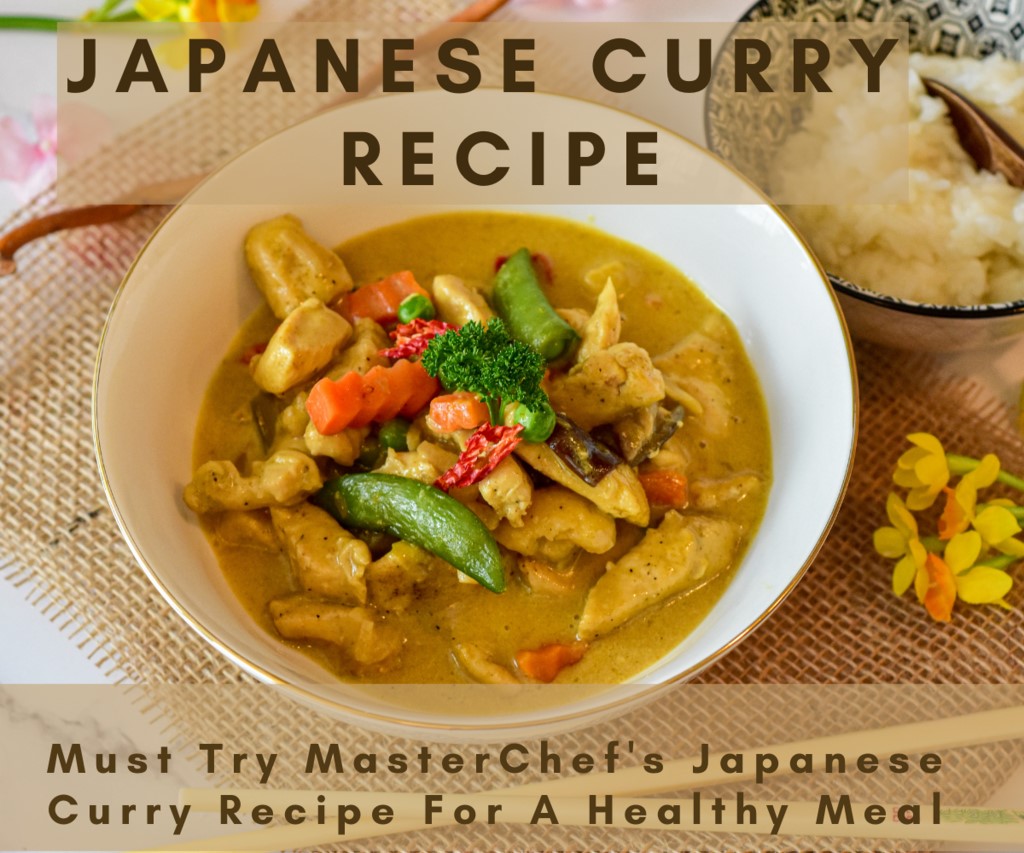
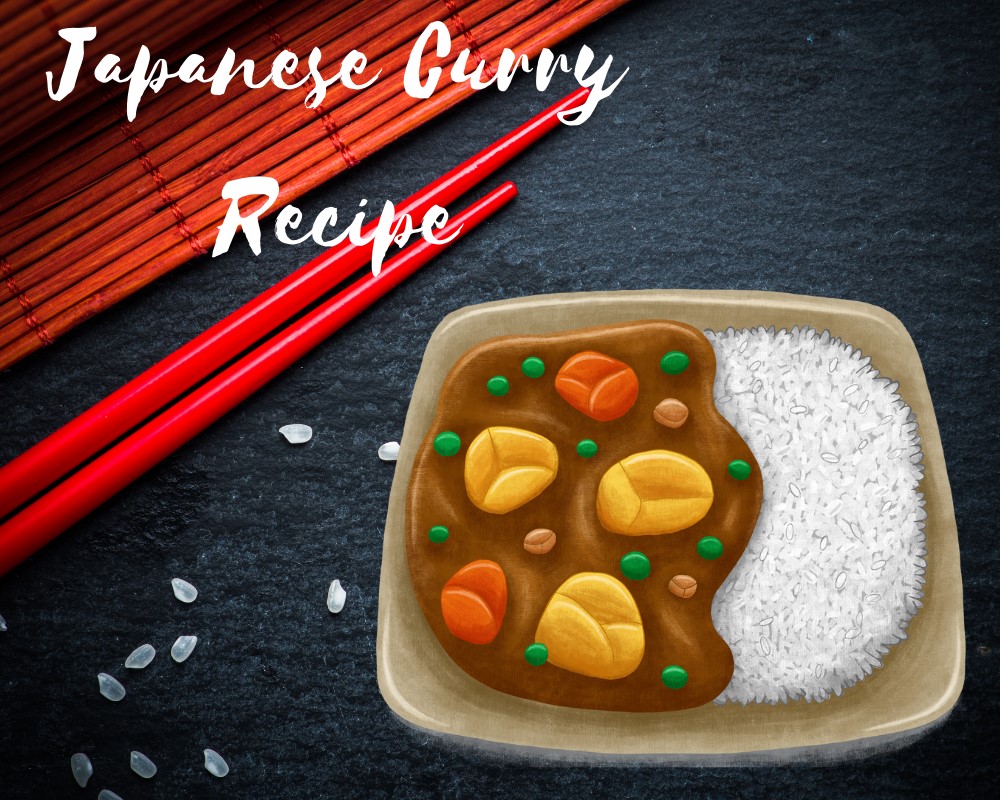
Looking for a healthy warm meal to serve on a weeknight? Try Master Chef’s Japanese Curry Recipe and surprise your family with your smart cooking skills. Enjoy tender chicken bites and succulent vegetables drenched in a warm chicken curry sauce- all perfect on a frosty winter night. Serve the scrumptious Japanese curry with plain steamed rice or toast tortilla.

What is the Japanese Chicken Curry Recipe?

Japanese curry is a popular dish in and outside Japan. It was first introduced by local Chefs during the Meiji era. Later, Indian troops introduced curry powder to Japan, and Japanese curry took on a western style. Despite this, the Asain savoury sauce has always retained the pure Japanese curry flavor. There are three main styles of curry in Japan served as main course meals.

  • Curry with Rice
  • Pastry filled with Curry
  • Curry over Noodles

However, Japanese curry rice has always been the most loved and easiest to cook food. It’s indeed a daily dinner for some curry-lover Japanese families. The genuine Japanese curry recipe usually uses boiled vegetables like carrots, potatoes, and onions. Moreover, the protein options include chicken, pork or beef. Here, we are going to cook the Master Chef’s Japanese Curry Recipe that uses chicken and assorted vegetables of your choice.

What does curry taste like?

Japanese curry is the most flavorful curry in the World. It’s different from Thai or Indian curries being sweeter and saltier at the same time. Unlike Indian curry, Japanese chicken curry is non-spicy and thick. Moreover, the caramelized onions, sweet carrots, and potatoes give the salty chicken curry a tinge of deep sweetness. Because of the mild heat level, this Japanese curry recipe is best for the whole family, especially for toddlers.

How to make curry instantly?

If you are in a hurry and have no time to cook Japanese curry, you can buy a Japanese curry roux. Japanese curry roux is a premade, dried, and concentrated curry cube used for instant cooking. It is widely manufactured by top Asian brands i.e. S&B golden curry. You can opt for any brand with required heat level and taste. Nevertheless, people outside Japan use S&B golden curry to satiate themselves with the original Japanese curry flavor.

The Japanese Curry Roux

Japanese curry roux is totally a game changer. It comes in a variety of flavors and heat level. However, mild, medium, and high spice levels are graded according to Japanese taste preference. Even the high heat level of curry is less spicy than Thai or Indian curries. You can opt for any spice level while opting for the best curry roux.

Additionally, curry roux is rich in saltiness because Japanese love ultrasalty  flavors. Therefore, one quick idea is to balance the saltiness by serving the chicken curry with plain steamed rice or unsalted bread.

How to make Japanese Curry Roux? Quick Tips

For instant yet delicious curry rice cooking, buy S & B golden curry roux. Choose your favorite spice level and other customizable flavors  like applesauce and onions. Then, take a saucepan or pot and fill it with the required amount of water as labelled on the package. Here, Master Chefs recommend avoiding chicken stock since curry roux is too salty.

Heat the water and add S&B golden curry roux. Also, make sure to add less curry roux first to help you adjust the taste. Let it heat on a medium flame to thicken. Once thick, you can add more water if you want it more runny. Furthermore, know how to thicken curry? You can add cornflour in the curry to make it real thick and creamy using less curry roux.

Main Components of a Chicken Curry:

Before you begin cooking Japanese curry, you must know the main ingredients to cook an original Japanese chicken curry recipe. It is also important to know which ingredients contribute to specific flavors as well as what you can replace and customize. Moreover, you should know where to buy these delectable components of a Japanese chicken curry.

Japanese Curry Recipe

Chicken:

Chicken is the main protein for a Japanese chicken curry. Whereas in other Japanese curries, you can use pork, beef, or fried tofu according to the recipe and your preference. Sear, grill, or bake beef for beef curries and deep fry the tofu for delicious S&B curry.

For your Japanese chicken curry recipe, you will need bite size boneless chicken cubes. The chicken cube is the best cut for curries. Because small cubes of chicken can drench and soak up the curry sauce, making the protein juicy and tender. You can buy fresh or frozen boneless chicken for this ultimate Japanese chicken curry recipe.

Veggies:

It’s quite surprising to know that Japanese chicken curry is the only recipe that goes best with every veggie. Traditionally, Japanese use carrots, onions, and potatoes for the basic chicken curry recipe. Nevertheless, you can opt for any fresh vegetables of the season to take your curry to the next level. The veggies we have tried and the results were just mouth-watering include:

  • Mushrooms
  • Baby Corns
  • Bell peppers
  • Broccoli
  • Cauliflower
  • Celery
  • Scallions
  • Green Peas
  • Green Beans

You can also add sweet potato and grated apples to give your curry recipe a sweet and slightly acidic flavor. Moreover, you can add hard boiled eggs on top of the delicious Japanese curry to make it warm, healthy, and healing.

Curry Roux:

If you hesitate using store bought instant food items, you can make homemade Japanese curry roux yourself. No worries! Because this 5-ingredient homemade Japanese curry roux will only take you half an hour extra. Anyhow, if you trust the quality of Japanese curry roux, use it to cook your curry real fast.

You can opt for any brand of the curry roux. However, I prefer to use S&B golden curry roux. Furthermore, opt for the required spice and heat level. Some brands use colors to indicate spice grade i.e red for hottest, green for medium heat, and blue for less to non-spicy. Colors for spice grades may also vary with different brands.

Honey:

Honey is the main ingredient to add sweetness to the Japanese chicken curry and to balance the intense saltiness. Japanese frequently use honey to add sweetness to their recipes. Therefore, if you want to cook an original chicken curry recipe, add honey.

Sauce:

When it comes to Japanese chicken curry sauce, you have a huge range of sauces to add. Different sauces give specific flavor and complexity of tastes to the curry. You can add soy sauce or worcestershire sauce for a rich umami flavor. Moreover, ketchup for tanginess, and oyster sauce sauce for BBQ tinge. Also, Chef’s use tonkatsu sauce for tonkatsu curry. A quick cooking tip is to use a different sauce each time. In this way, your family will not get bored of the same chicken curry for each weeknight dinner.

Toppings:

There’s a variety of toppings and seasonings you can use to spice up the classic taste of your Japanese curry. You can add pickled winter radish, pickled red ginger, bean sprouts, hard boiled eggs, and sesame seeds for more warmth. Furthermore, you can use a popular Japanese condiment known as Fukujinzuke. It is made with various pickled and dried vegetables (daikon radish being the main ingredient) seasoned with soy sauce. You can easily buy Fukujinzuke at Asian grocery stores.

Personalize Japanese Curry Recipe Ingredients

First of all, a Chef’s trick is to use different spice levels of curry roux in your Japanese chicken curry. In this way, you can add various flavors to create complexity of textures and aromas. Moreover, you can also try some weird or uncommon ingredients like me. I have tried them many times and the results are incredible. In a nutshell, you can personalize your Japanese curry by adding:

  • Butter to cook chicken and vegetables and at the end to make curry luscious
  • Grated apple to add sweetness and acidity
  • Ketchup for extra tangy flavor
  • Oyster sauce for BBQ hint
  • Yogurt for creaminess and slight acidic flavor
  • Sake for mildly sweet and astringent flavor

How to Make Japanese Curry?

Japanese Curry Recipe

Ingredients for Japanese Curry


Chicken (thigh piece, skinless, and boneless cubes) 1.5 lb (2 lbs for pork,  beef, tofu, seafood, mushrooms)
Vegetable oil (unflavored, non aromatic) 1 and ½ tablespoon
Onions 2 medium sized
Ginger ½ tablespoon
Garlic 2 cloves
Potatoes 2 medium sized
Carrots 2 large
Apple 1
Japanese curry roux 1 packet (200 grams)
*Chicken stock 2-4 cups
Water 2 cups
Soy sauce 1 and ½ tablespoon
Ketchup 1 tablespoon
Honey 1 tablespoon
Kosher salt/ sea salt As needed
Black pepper As needed

*If you are using store bought curry roux then, prefer to use plain water or half of water and stock 1:1. It is because curry roux can be too salty.

*Pay special attention to cardiac patients and monitor sodium levels.

Ingredients for Toppings and Seasoning


Eggs (boiled) As needed
Fukujinzuke As needed

How to Make Japanese Curry? Steps and Instructions

Gather and Measure Ingredients

To cook your meals without any mess and trouble, always gather your ingredients, utensils, and kitchen tools before you begin cooking. Then, accurately measure all ingredients so that you’ll only need to add them in the recipe at the right step.

Prepare Ingredients

This step involves preparing all ingredients beforehand.

Prepping Protein:

Wash your chicken pieces , remove extra fat or skin if present. Then, cut the chicken into bite size cubes for easy picking and eating. However, if you have bought already cleaned and cut boneless chicken then, simply wash and  pat it dry.

Prepping Veggies:

Wash and dry all your favorite veggies. Peel the carrots and potatoes. Then, cut potatoes in cube shape, onions into wedges and rings, and carrots into rolling wedges. Moreover, cut the green onions in rings for garnishing, and make ginger and garlic paste. Make sure to soak potatoes in water for about 15 minutes to remove starch and to prevent its discoloration. Also, coarsely grind black pepper.

How to make curry chicken?

Take a large pot and pour vegetable oil in it. Heat the oil over medium flame, put the onion rings in it and let it saute. Make sure to make onions look translucent  rather than golden brown. Then, add fresh ginger and garlic paste. For a rich flavor, try to make ginger garlic paste in a wooden pestle and mortar.

Once you smell the beautiful aroma, add chicken cubes and let it fry till golden brown. Now. add your favorite root veggies that are hard and need time to cook. Then, add chicken broth diluted with equal amounts of water to help balance saltiness. Cover the lid and let the chicken and root vegetables become tender and juicy. Once the broth starts boiling, remove the skim or chicken fat using a fine mesh strainer.

It’s time to add some sweetness and texture to your Japanese curry, grate an apple into the broth for this purpose. Moreover, to intensify apple sweetness, add a tablespoon of honey, and a pinch of sea salt. Simmer the broth with chicken and veggies for about 20 minutes without a lid. Make sure to stir it often, then add potatoes or other soft vegetables. Let it cook for another 15 minutes till these  veggies are cooked.

Add Japanese Curry Roux

If you are using commercial curry roux, add the cubes and stir them one by one. Thoroughly stir the curry using a wooden spoon until the curry roux cubes dissolve. However, if you are using homemade curry roux then, dilute it with chicken broth first before adding it into curry. Stir well till the Japanese curry becomes thick.

Seasoning Japanese Curry

You can add sauces of your choice to make a unique flavor of the chicken curry recipe. I prefer to add soy sauce and oyster sauce for a rich umami and bbq flavor. Nevertheless, you can also add worcestershire sauce, ketchup or tonkatsu sauce for tonkatsu curry.

Serving Idea for a Golden Curry:

The best and popular way to serve Japanese curry recipes is to boil some plain rice. Then, serve warm golden curry with steamed rice, fukujinzuke, and if you like boiled eggs. Other ways to relish a chicken curry recipe is to fill in the bread to make stuffed pastries or serve hot with bread or tortilla.

FAQs

Can we make Japanese curry in a pressure cooker?

Yes, you can easily cook a Japanese curry recipe in a pressure cooker. This will help you cook real fast and taste great at the same time. Moreover, you can also make chicken curry recipes in an instant pot or saucepan.

How to Store Japanese Chicken Curry?

You can store cooked Japanese chicken curry in an airtight container. Prefer to use a glass jar for this purpose to avoid staining plastic containers. You can keep the leftover chicken curry fresh in a refrigerator for only 3 days. Whereas, you can store concentrated chicken curry in a freezer for upto month.

How to Reheat Japanese Golden Curry?

Just take out freezed curry in a non-stick pan and add about one-fourth to 1 cup of plain water in it. Heat the curry on low to medium flame and stir in between to help dilute fast. Moreover, if your golden curry gets too diluted, know How to thicken curry? Use cornflour, make its paste, and add it to your golden curry.

What type of Chicken should we use for a Japanese Curry Recipe?

I prefer to use chicken thighs and make boneless cubes out of it. It is because the leg piece is more juicy, tender, and it does not dry out as chicken breast. However, if you like chicken breast pieces, you can opt for it but make sure to cook it separately. Then, add chicken to the cooked chicken curry and let it soak in curry sauce.

What is the Nutritional Info of Japanese Curry Recipe

A bowl of curry chicken and rice will provide you the following percentages out of the daily calorie intake.


Nutrients % Daily values
Total Calories 13
Total Carbohydrates 5
Protein 50
Total Fats 17
Cholesterol 38
Sodium 26
Potassium 15
Vitamin A 70
Vitamin C 5
Iron 10
Calcium 5

*% daily values may vary according  to the ingredients you use in your Japanese curry recipe.
*Above information may not be medically authentic.

*Consult a dietician if you are following a medically restricted diet.

How To Cook Sushi Rice Like A Michelin Star Chef

How To Cook Sushi Rice

Are you craving to relish the World’s Best Sushi right in your home? Explore Oriental Cuisine and master the art of Japanese cooking. Review our Michelin Star Chefs’ Recipes and learn how to make authentic Japanese food. Here is the complete guide to cook the perfect sushi rice that’ll help you cook an assortment of sushi dishes.

What is Sushi Rice?

Japanese rice outside Japan is famously known as sushi rice. Su-meshi and sushi-meshi are two other names for classic sushi rice used in Japan. The basic ingredient for sushi rice is steamed short-grain rice, which is seasoned with rice vinegar, sugar, and salt. Nevertheless, the term sushi literally means rice with a sour flavor. There are many ways to give perfect sweetness and savour to these sticky sushi rice.

The Origin of Vinegared Rice:

Historically, Japanese people used to wrap fish bites with fermented rice to prepare the delectable sushi. When sushi was ready to be served, the fermented rice went bad. Therefore, people used to discard fermented rice and they only eat fish. This unpleasant experience led them to try and increase the shelf life of sushi rice.

Consequently, they came up with the idea of using vinegar that was already being used to preserve food. The vinegar not only kept the Japanese short grain rice fresh, but they also tasted even better. Furthermore, it is vinegar that adds the ultimate umami flavor to sushi rice, further accentuated by kombu.

How To Make Sushi Rice: Simple Tips On Your Fingertips

Interested in learning how Michelin starred chefs prepare sushi rice? If so, then, put a glance at the following tips and instructions before you begin cooking.

How To Cook Sushi Rice

What Kind Of Rice For Sushi Should We Use?

If you want to achieve that real Japanese flavor, then opt for the best short grain Japanese rice. Make it clear that long grain rice will not provide you the perfect stickiness, consistency, flavor and presentation. Therefore, only opt for the best quality of short grain Japanese rice. Rice cultivars such as these contain high moisture content that gives your sushi rice just the right amount of stickiness and flavor.

According to our survey and Chef’s preference, we have listed the top 5 brands for the premium quality short grain rice. You can opt for any of these brands to make sushi rice that tastes delicious.

  • Koshihikari short grain rice
  • TamanishikiShort Grain Rice
  • Kijima Tsuyahime Yamagata Japanese SushiRice
  • Hitomebore Japanese Short grain Rice
  • Akitakomachi Japanese Sushi Rice

How to Prepare Sushi Rice For Cooking?

To perfectly cook rice for sushi, wash the translucent short grains in water. Do this rice rinsing  for about 3-4 times or unless all starch gets washed away. It is an essential step to get the exact stickiness and consistency of sushi rice. After rinsing, soak the sushi rice for about an hour to achieve a buttery soft texture and to cook them fast.

Sushi Rice Seasoning

The classic sushi rice seasoning uses a sushi vinegar to give your sushi rice the ultimate umami flavor. You can prepare the traditional sushi seasoning by adding sugar and salt to rice vinegar. In addition, you can bring sweetness to saltiness by using coconut sugar, honey, or granulated white sugar.

Kombu is another great way to obtain the taste of Michelin Star restaurants’ sushi rice. It’s a seaweed that is used as a natural taste enhancer. You can get the essence of deliciousness by using kombu in your sushi rice recipe.

Ideal Sushi Rice Cooking Utensils

There are multiple cooking utensils you can use to cook sushi rice. For instance, a saucepan, instant pot, and a cooker. What I prefer is to use a Zojirushi sushi rice cooker since it is engineered to cook sushi rice perfectly. It has a capacity of cooking 3 cups of sushi rice at once.

Also, you will need a wooden hangiri to pour your cooked sushi rice. Furthermore, to delicately toss sushi rice with sushi rice vinegar seasoning, you probably need a wooden rice paddle. Japanese Chefs use a hand fan in their one hand while tossing sushi rice to remove steam. This technique is another great tip to prevent mushy sushi rice.

How To Make Sushi Rice In Rice Cooker?

Open the lid of your cooker, put rice and pour water. Then, place kombu on the top and set the pressure according to  your cooker. Cook the sushi rice until it’s soft and slightly sticky. Remove the kombu and serve.

Instant Pot Instructions:

In an instant pot, put the rice, water, and kombu in the same way. First cook the rice on high pressure for about 5 minutes and then release the pressure for 10 minutes. Discard kombu and serve sushi rice in bowls.

Stovetop Cooking:

As you cook sushi rice on the stovetop, add two and a half cups of water to three cups of short grain rice. Place kombu on the top of rice and cover the saucepan with a lid. Cook the sushi rice on high flame for about 5 minutes until the water simmers. Then, lower the flame and cook sushi rice until tender for about 15 minutes. Turn off the flame and let the rice steam for 5-10 minutes. Remove kombu, add sushi rice vinegar, and serve.

Ingredients For Different Sushi Rice Servings:

Ingredients for Sushi Rice:


Ingredients Measurements
Japanese short grain sushi rice 2 cups
Water 2 cups or 360 ml
Rice vinegar 2 tablespoons
Kombu (Optional) One 4 inches square

Ingredients for Sushi Rice Vinegar:


Rice vinegar 2 tablespoons
Granulated white sugar 1 tablespoon
Sea salt ( measure less with iodized salt) Half tablespoon

The Michelin Star’s sushi rice recipe: steps to follow

#1 Gather and Measure Ingredients:

Working orderly and in a sequenced manner with no hassle and mess around greatly affects cooking. Before you begin preparing a dish, always gather ingredients and accurately measure them. Therefore, while cooking you will only need to put them at the right time.

#2 Rinse Uncooked Sushi Rice:

Thoroughly wash and rinse Japanese short grain rice for about 3 to 4 times. Rinsing helps you wash away any debris and removes excess starch from the grains. For this purpose, gently move your fingers in a circular motion through the rice and water in a bowl. Then, strain the sushi rice to remove starchy water. Moreover, healthy cooking begins with hygienic preparation.

#3 Soak Sushi Rice:

For even and rapid cooking of sushi rice, it’s essential to soak them for about an hour before cooking. It helps sushi rice to soak enough moisture that helps them become tender easily upon cooking.

#4 Cooking Sushi Rice:

Put the uncooked sushi rice in a large saucepan and add measured water. Then, place kombu on the top, cover the lid and cook the rice. Firstly, cook the sushi rice on high flame for 5 minutes then lower the heat and cook until the sushi rice gets softened (in 18 minutes). The usual cooking time for sushi rice is about 23 minutes.

Furthermore, if you are using an instant pot or sushi rice cooker then prepare sushi rice according to the labelled instructions. Add water according to the sushi scale graded on the inside of the cooker. Also, make sure the sushi rice water ratio should be 1:1. In this recipe, we are taking 2 cups of water for 2 cups of uncooked sushi rice.

#5 Sushi Rice Vinegar:

To prepare sushi rice vinegar on the stovetop, take a saucepan and add measured amounts of rice vinegar, sugar and salt. Simmer the sushi rice seasoning on a medium flame and use a whisk to gently stir till the sugar dissolves. For instant cooking, you can put all the ingredients in a bowl and microwave for one to two minutes. Set aside and cool it at room temperature. Sushi rice vinegar is ready to drizzle.

How To Cook Sushi Rice

#6 Sushi Rice Seasoning:

Take out your traditional Japanese serving dish known as sushi hangiri or sushi oke. If you don’t have one, you can still serve your delicious sushi rice in a glass bowl. Grease the bottom of a wooden hangiri or spread parchment paper. Then, transfer the cooked sushi rice and spread evenly using a rice paddle. Drizzle the sushi rice seasoning on top of warm sushi rice and fold to evenly season them.

#7 Remove the Steam:

Using a rice paddle, turn and toss the sushi rice with sushi rice seasoning. Mix , slice up, and flip sushi rice at a 45 degree angle in one direction to remove steam. To aid the cooling process, you can use a fan in one hand to help accelerate steam removal. This mixing technique helps you avoid ending up with mushy rice. Indeed, a great tip by a Michelin Star Chef.

#8 Cover Before Serving:

If you have time before serving sushi rice to your guests, cover the hangiri with a damp towel or cloth. Covering sushi rice helps avoid evaporation of required moisture, stickiness, and gloss.

#9 Tips to Store Cooked Sushi Rice

Refrigerating cooked sushi rice makes them hard and dehydrated. You can store cooked sushi rice for about a month in an airtight jar and place it in the freezer. Air tight containers help avoid frosting of food. Moreover, defrost the sushi rice overnight in the refrigerator before consuming. You can also defrost sushi rice in a microwave, but make sure to bring it to room temperature. Hence, excess heating in the microwave will make sushi rice mushy. Cover the bowl with a damp kitchen towel and refrigerate it if you want to consume sushi rice tomorrow.

#10 Serving Tips:

You can either serve sushi rice with fish or can use sushi rice to make a variety of Oriental dishes. Tantalize your taste buds with wasabi dip, soy sauce, and avocado puree to spruce up the umami flavor of sushi rice.

FAQ’s:

What kind of sushi dishes can be prepared with sushi rice?

You can prepare a number of Japanese dishes with the classic sushi rice. Moreover, you can add sushi rice in any recipe to make an innovative dish. Use sushi rice to make dragon roll, onigiri, california roll, spicy tuna roll, mochi, inari sushi, temari sushi, and temaki sushi. You can also eat sushi vinegared rice with pickled vegetables, wasabi, avocado, and soy sauce.

How To Tell Perfectly Cooked Sushi Rice?

After you cook and steam your sushi rice, they should be fluffy with a nice bite. Also, each rice should retain its shape well, should have a pleasant luster, and should be soft. For this purpose, make a perfect sushi rice water ratio and do not let your sushi rice become mushy rice.

The Time Guide On How To Cook Sushi Rice

Time is not an issue when you are using a highly engineered cooking device. For instance, cooking sushi rice in an instant pot or electric cooker that comes with a timer and pressure setting for each dish. When cooking on the stovetop, you should cook sushi rice on high flame for 5 minutes to let the water simmer. After that, boil the sushi rice on medium to low heat for about 18 minutes. Finally, let the rice steam for 5-10 minutes and discard kombu before serving.

Why Do We Soak Sushi Rice Before Cooking?

Soaking short grain Japanese rice for sushi rice dishes is an essential step. If you want to cook sushi rice like a Michelin Star Chef, soak the premium quality sushi rice for about 20 to 30 minutes before cooking. Also, always use room temperature water to cook sushi rice. In a nutshell, you will get soft yet firmly-shaped glowy sushi rice.

What is the Nutritional Value of Sushi Rice?

Count the calories before you begin cooking and eating anything. It is essential to watch what you eat and to maintain a healthy lifestyle.

Nutrients Weight (grams) % Daily value
Proteins 1.7 3
Total Carbohydrates 23.5 8
Fats 1 2
Iron 0.4mg 2
Magnesium 6.2mg 2
Sodium 158.2mg 6
Vitamin B3 0.9mg 7

* % Daily values are based on a diet of 2000 calories. Data given does not include nutritional value of each ingredient used in the recipe. Kindly consult a dietician in case you are on a restricted diet due to medical reasons.

The Chef’s Tutorial for The Perfect Miso Soup Recipe

japanese miso soup recipe

How about enjoying a warm and nutritious miso soup on a cold, wintery night? Undeniably, delicious and nourishing. Moreover, finding the best Japanese restaurant in your region to savor an authentic miso soup is a real challenge. What if you cooked the World’s best miso soup yourself? Yes, you can! Because we’re bringing you the Super Chef’s Miso Soup recipe that is super easy too. Try this homemade miso soup recipe for a healthy and hygienic meal.

There are many traditional Japanese soups and stews that are easy to cook and are full of nutrition. Miso soup is delicious, has a variety of taste options and is highly customizable. Hence, you can add different vegetables, mushrooms, tofu, herbs, and spices according to your taste preference and availability of ingredients.

What is Miso Soup?

Miso soup is a Japanese delicacy that is served with steamed rice. Outside Japan, many restaurants serve miso soup as a side dish, an appetizer, or with a salad as a starter. In general, a Miso Soup is a broth seasoned with miso paste that is savory, warming, and nourishing. Moreover, preparing miso soup requires very little effort. All you need to do is make the broth, prepare the other add-ons and season.

Main Components of a Miso Soup Recipe:

If you have never tried miso soup before, this recipe will explain everything about it. One must, however, have detailed knowledge of a traditional recipe native to a specific region. So let’s begin exploring Japanese Cuisine. There are two main basic components of a miso soup recipe. One is the stock and the other is Japanese soybean paste. In addition, all other ingredients are customizable and you can add what you like. Traditionally, Japanese people used to add vegetables, vegetables, dried fish, tofu, and wakame to the miso soup stock.

Dashi (The Delectable Japanese Soup):

First of all, make sure that you cannot make miso soup with different types of broth. In other words, to cook genuine miso soup you must learn to make original Japanesedashi. Some people use instant dashi powder to make miso soup stock. However, such commercial products contain monosodium glutamate- quite toxic for a healthy metabolism. Also, the taste and aroma of miso soup fades quickly if you use instant dashi powder.

Well, it’s quite easy to make and there are many ways to cook it. Some people love vegan miso soup so they make dashi only with kombu kelp. Whereas, others love to add fish flakes, anchovies, and clams to make miso soup more nourishing.

Types of Dashi:

Awase Dashi:

You can make delicious Awase Dashi for your warm miso soup if you love both veggies and meat. It includes two main ingredients; the kombu kelp and dried bonito (smoked and fermented tuna) flakes. It’s super nourishing and soothing for tuna lovers.

Kombu Dashi:

For vegan miso soup lovers, kombu dashi is a perfect miso broth. It’s made by boiling water with kombu kelp and miso paste.

Iriko Dashi:

This miso soup dashi is made by adding anchovies and soybean paste to the boiling water. Anchovies have a strong flavor and are salty. Therefore, carefully add salt to the miso soup broth.

Miso Soup

Miso ( The Savory Soybean Paste):

Miso is merely a fermented soybean paste. It is made by fermenting soybeans, steamed rice or cooked barley with Aspergillus oryzae. The Japanese call this fermentation culture koji that is seasoned with salt to bring the ultimate umami flavor. However, you can buy miso paste at the market since you cannot ferment it at home that way. There is a huge variety of miso pastes available in the market. They vary in color, taste, aroma, and saltiness. You can use just one type of miso or add 2-3 different miso pastes to create a unique flavor.

Types of Miso For Miso Soup:

Red Miso:

In Japanese, red misu is known as “aka miso” and is of dark reddish brown color. It’s dark hue clearly depicts the long fermentation period (upto 3 years). Also, because of the prolonged aging, red miso has a slightly bitter to pungent flavor with high saline content. Moreover, carefully add red miso to the miso soup since it can mask other beautiful flavors. It’s best for people who love strong flavors.

Yellow Miso:

Golden yellow to light brown colored miso paste is known as “shinshu miso” by the Japanese residents. The light color indicates a short fermentation period i.e. upto 1 year. With a tang of sweetness and an unmistakable burst of acidity, yellow miso imparts a lovely earthy, lightly salted taste. Furthermore, generously add yellow miso to take your classic miso soup recipe to the next level.

White Miso:

Shiro miso is the Japanese name for white miso of a light yellow to beige color. It is the most widely used miso to spice up Japanese dishes. Moreover, it is fermented for just a few weeks, which gives white miso a light salty and sweet flavor.

Add Ons ( Veggies, Mushrooms, and Tofu):

Mostly, people love tofu soup but there are many other ingredients you can add to your classic miso soup recipe. If you live in Japan, you will understand that drinking the same miso soup daily makes you bored. Therefore, to take your basic miso soup recipe to another level, try adding different combinations of vegetables and meat. You can add carrots, bonito flakes, anchovies, calms, radish, onions, potatoes, egg plant, mushrooms, somen noodles, spinach, and wakame seaweed. Moreover, the cooking time of ingredients should also be taken into account when adding ingredients.

Follow Just One Cookbook Miso Soup Recipe:

Miso Soup Recipe

Awase Dashi Ingredients:

Ingredients Measurement
Water 4 cups
Kombu Kelp (dried) One 4 inches square piece
Bonito Flakes (dried) 3 cups

*If you want to enjoy vegan miso soup then, do not add any seafood like bonito flakes or anchovies.

* Exclude bonito flakes and replace with anchovies for Iriko dashi

Miso Soup Ingredients ( One Bowl):

Dashi 1 cup
Miso paste 1 tablespoon
Green onion or scallions As needed (for garnishing)
Other ingredients ( veggies, mushrooms, seafood) As per preference

How To Make Miso Soup: Instructions

First of all gather all ingredients and measure them accurately. Wash and clean any vegetables and other edibles. Additionally, pour out the miso paste into a bowl to facilitate adding it to miso soup.

Making Dashi For Miso Soup

The following steps will help you cook fresh dashi to make delicious miso soup. In addition, you can follow the same recipe to store the bulk amount of dashi.

Prepare Kombu Kelp:

Gently wipe off kombu kelp with a damp kitchen towel and do not attempt to remove the essential white powdery substance. If you want to relish the ultimate umami flavor of kombu kelp, it’s essential to soak it in water overnight. It’s indeed a Chef’s secret to make authentic and delectable miso soup. Nevertheless, if you are in a hurry then soak the kombu kelp for at least an hour.

Kombu Dashi:

The water in which your kombu kelp is soaked is known as kombu dashi. Pour this cold brew along with kombu kelp in a saucepan. Heat it at medium to low heat and remove kelp just as the kombu dashi begins to boil. At this point dashi will become a little slimy and bitter. However, if you do not want a strong and bitter flavor then, remove kombu kelp before dashi begins to simmer.

For non-vegetarian Miso soup lovers:  

You can try Awase Dashi, if you are a non-vegan miso soup lover. For this purpose, add dried bonito flakes also known as Katsuobashi. Simmer katsuobushi with kombu dashi for about 30 to 60 seconds. Then, turn the flame off and let it steep for another ten minutes. Finally, strain your Awase dashi with the help of a sieve.

The Miso Soup Recipe:

Take a saucepan and  pour a cup of your freshly cooked dashi. Now, it’s time to add your favorite ingredients. Make sure to add them in descending order according to their cooking time. First of all, add hard root vegetables and then the softer fish flakes and veggies. To prepare clam miso soup, add clams before dashi boils and heat till shells open. One, dashi boils, add soft veggies like cabbage, leeks, mushrooms. For a healthy breakfast miso soup, you can add boiled eggs in the end.

Ingredients to Add Before Dashi Boils

Carrots

Radish

Pumpkin

Onions

Potatoes

Turnip

Clams

Ingredients to Add After Dashi Boils

Bean sprouts

Cabbage

Brinjal

Egg

Mushrooms ( shiitake, maitake, nameko, enoki, shimeji)

Leeks

Somen Noodles

Spinach

Wakame seaweed

Soybean curd

Tofu (silken, deep fried, or medium-firm)

Add Miso Paste

Add one tablespoon of your favorite miso paste to a small amount of dashi, dissolve it, and add it to the pan. The ratio of dashi to miso paste is 1:1. You can double the amount according to your requirement. Do not over boil dashi after adding miso. Therefore, Chefs recommend adding hard ingredients first before boiling dashi and sofer later.

Add Tofu

One your delicious miso soup is ready, add tofu in it and gently stir. Do not add medium-firm tofu before boiling of dashi or else you will mash up tofu in miso soup.

Garnishing

Finally, add beautiful and scrumptious granishings. If you love wakame seaweed, rehydrate the dried wakame available in the market in a separate bowl. This step helps you wash away excess saltiness of wakame before adding it to miso soup. Then, add greens that don’t require much cooking. For example, green onions, scallions, yuzu, blanched spinach, and mitsuba. Another Pro tip is to add fragrant and colored garnishings right before you serve warm miso soup. Prepare fresh and serve hot!

Serving Ideas of Miso Soup Bowl:

  • Miso Soup with Side Dishes: Nimono, Aenomo, or with pickles
  • As Main Dish served with grilled fish or Sashimi (raw meat slices), or steamed rice
  • As a soothing and nourishing soup
  • Best for Healthy Breakfast, Brunch, Lunch, and Dinner

The benefits of drinking warm and healthy homemade miso soup:

Traditional Japanese miso soup is so healthy and nourishing that native people consume it daily. It’s just like Turkish people drink cava daily to keep them active, fit, and healthy. It helps you relieve cough, cold, and nasal congestion. Moreover, it keeps your muscles, collagen, bones, and cartilages strong and sturdy. Below are some very important advantages. In short, there is a long list of benefits of miso soup.

Miso Soup Benefits

Its Whole Nutritious Value

Miso soup generously contains all essential nutrients you daily require to function well. It’s a rich source of essential vitamins and minerals that helps metabolism work well. Miso soup gives you proteins, carbohydrates, good fats, vitamin A, C, K, B Complex, iron, calcium, magnesium, copper, manganese, sodium, and zinc.

Healthy Gut:

Though miso soup is not a rich source of dietary fibre, it can still prevent and treat constipation. It is because iso soup contains miso paste that is a storehouse of probiotics. Drinking miso soup daily helps your Gut function well, improves nutrient absorption, and discards wastes with ease.

Stronger Bones:

Consuming miso soup as a natural supplement of calcium, magnesium, phosphorus, and potassium, helps fortify your bones and joints. Miso soup is the best ever formula you have ever tried for growing individuals.

Improves Heart Health:

Miso soup contains zero cholesterol, Vitamin K2, and potassium that all works to strengthen heart muscles. It also contains iron that helps proper oxygenation of blood and supports the circulatory system. A diet meal that helps you lower bad cholesterol is ultimately the best natural medicine to prevent various heart diseases.

Reduces Risk of Cancer:

Many studies elaborate that consuming miso soup daily can reduce the risk of stomach and liver cancer. Nevertheless, a more in-depth study is necessary to confirm this hypothesis.

FAQs:

What is the Nutritional Value of Miso Soup?

One miso soup bowl provides you a total of 40 calories. Miso soup is also a rich source of probiotics, vitamin K, Vitamin A, C, Vitamin B Complex, and minerals such as copper, manganese, sodium,  iron, zinc, and calcium. Nevertheless, the nutritional values of miso soup vary as you include various healthy vegetables, seafood, and herbs.

Nutrients Measurement (grams)
Total Carbohydrates 3
Protein 3
Total Fat 2
Sodium 0.86

How to Store Miso Soup?

Well, it’s best to cook and consume miso soup fresh. If you want miso soup to consume it tomorrow or the day after tomorrow, refrigerate it in a container. However, miso soup flavor and fragrance fade over time. Another great tip is to cook and store only dashi without miso paste. Moreover, if your miso soup contains vegetables that can go bad real fast, remove them before storing soup stock.

How to warm up Miso Soup?

Warm up the stored miso soup in a pan over medium to low flame. Do not heat up at a high flame or else you will burn all the essential nutrients.

Is it possible to cook and store a batch of dashi?

Yes, you can cook and store a bulk of dashi in your refrigerator or freezer to use for a variety of Japanese dishes. Put dashi in a closed container and keep in the fridge for about 5 days. If you wish to store dashi for two weeks, place it in the freezer. Moreover, if you already have prepared dashi then, preparation of miso soup will only require ten minutes. Simply, put frozen dashi in a pan and cook it with other ingredients.

Is it possible to add different miso pastes to Miso Soup?

Yes, of course, It’s a chef’s secret to add a blend of different miso pastes. This trick helps you get a unique blend of flavors i.e. sweetness, saltiness, bitterness, and acidity.

The Culinarian’s Secret Onigiri Recipe (How to Make Onigiri)

Onigiri Recipe

Need something healthy and light to eat every day? Try the delicious Japanese rice balls that are famously known as Onigiri. These easy to make snacks are so nourishing that you can include them in your diet. In Japan, onigiri is easily available at restaurants and shops. However, if you want to relish the genuine Japanese rice balls, make them yourself. Find out how the culinarian makes his secret onigiri recipe right here.

What is Onigiri?

Onigiri- the famous and delicious delicacy of Japanese cuisine has so many other names. In Japanese, it is known as Nigirimeshi or Omusubi, whereas outside Japan, it is called Musubi. It’s a simple recipe that comprises a rice cake stuffed with various fillings. Onigiri is either shaped as balls, triangular cones or cylindrical rolls. Moreover, these Japanese rice balls are often wrapped with seaweed Nori. You can serve onigiri with tuna mayo dips, pickled plums, and bonito flakes, which add to its taste and appeal.

Onigiri and Sushi are Different

The ingredients of both onigiri and sushi include steamed rice, fish fillings, and seaweed wraps. A major difference lies in the fact that Japanese rice balls are made from only steamed rice seasoned with kosher salt. In contrast, sushi rolls use vinegared rice to stuff raw fish. Vinegar helps to increase the shelf life of steamed rice.

The Main Components in An Onigiri Recipe

Though onigiri is a fancy dish of Japanese cuisine, it’s so easy to make and comprises few ingredients. All you need is some steamed rice, furikake seasoning, and nori wraps. Moreover, you can highly customize the Onigiri fillings to make a variety of healthy snacks.In a nutshell, varying the fillings help you enjoy different tastes everyday.

Steamed Rice

First of all, cook some slightly slimy, sticky, yet medium-firm short grain rice. You can use both short grain and medium grain rice that are easy to shape in a cake. In addition, famous Chefs recommend using Koshihikari, Japanese short grain rice. The grain length, translucency, and texture is all perfect to make genuine Japanese rice balls. Nevertheless, you can opt for any best brand that is available in your region.

Furikake

Furikake is the traditional Japanese seasoning that is a blend of beautiful aromatic and flavorful ingredients. Originally, it contained dried bonito flakes, sesame seeds, seaweed, salt, pepper, egg, other herbs and spices. Besides making fresh furikake seasoning, you can use the ready made packets. Commercially, furikake seasoning packets are available with different ingredients and flavors. You can find them in most Asian markets. Nevertheless, Chefs and culinarias recommend making fresh furikake seasoning for delicious and aromatic onigiri.

Nori

Nori is a dried, flat and edible seaweed that is not an essential component of Japanese rice balls. Even though nori is a good way to hold onigiri. Furthermore, it gives soft rice balls a crunchy texture as well as a savory taste. You can buy nori sheets easily from any supermarket and use them right away.

Onigiri Recipe

Pro Tips to Make Perfect Japanese Rice Balls

Cook Fresh to Taste Well

When making Japanese rice balls, freshly cooked rice is the best. It is because the rice is slightly slimy, sticky, soft, and warm. By applying little pressure, the short grains get compact and make a firm shape. Moreover, freshly steamed rice tastes even better. Therefore, cook fresh to eat better. Another great tip for perfect presentation is cooking rice until it is moderately firm and shaped, yet soft.

Wetting Hands

It’s essential to wet your hands before you begin making Japanese rice balls. Wetting is necessary so that the rice does not stick and smash to your palm while applying pressure and shaping.

Rubbing Salt

Salt rubbing technique has been practiced in Japan for ages. It requires you to spread the salt on the rice ball evenly. The major purpose of this pro tip is to prolong the shelf life of rice. In short, salt is used as a preservative for steamed rice in onigiri recipes.

Don’t Squeeze the Rice Grains

To make onigiri, apply moderate pressure to the soft and short grains of rice and shape them up firmly. Put a sufficient amount of pressure on the rice to prevent it from falling off or getting smashed. Moreover, the rice grains should retain their shape even when molded to a circle, square or triangle since it’s crucial to work on presentation.

Keeping ‘Em Moist

If you have a couple of hours before serving onigiri then, cover them to keep moistened. For this purpose, you can use a plastic sheet or a damp kitchen towel to cover the plate. Additionally, if you don’t plan on eating onigiri until tomorrow, you should keep them in the refrigerator in an airtight container.

The Culinarian’s Secret Onigiri Recipe

Ingredients Required For Onigiri Recipe

Onigiri Recipe

Ingredients for Japanese Rice Balls

Japanese short grain rice 2 cups
Water 2 and half cups

Ingredients for Japanese Rice Cakes

Nori 4 sheets
Kosher salt/ sea salt/ table salt 1 tablespoon or to taste
Salted salmon 1 fillet
Dried Bonito Flakes ⅔ cup
Tuna 1 can
Kombu 1 packet
Mayonnaise 2 tablespoon
Soy sauce 2 and ½ tablespoon
Umeboshi (pickled plum) 3
Sesame seeds (white and black) As needed (for garnishing)

Ingredients for Onigiri Filling

Salted Salmon Salmon 1 fillet
Sea salt ½ tablespoon
Okaka Katsuobushi (dried bonito flakes) ⅔ cup
Soy sauce 2 tablespoon
Tuna Mayo Canned tuna 1
Mayonnaise (Japanese mayo) 2 tablespoon
Soy sauce ½ tablespoon


Step-byStep Method to Make Onigiri Like A Pro

1.     Gather and Measure

Gather and measure all ingredients accurately. This first step before cooking any delicacy is not to be missed. Especially, if you want hassle and mess free cooking.

2.     Steam Onigiri Rice

To make delectable onigiri rice balls, cook the japanese short grain rice fresh. It is because freshly steamed rice will assemble into beautiful rice cakes of any shape. Furthermore, freshly cooked rice tastes better than pre cooked dry rice.

a.      Wash and Rinse

Before you cook rice, wash them thoroughly. Put the rice in a large bowl and wash them under the running water. While washing, move your fingers in circular direction to remove any dust or stone trapped between grains. Rinse the rice for about 3-4 times before soaking them.

b.      Soak

Take a large bowl and put all the washed rice. Soak them up for about an hour to help them get soft and cook fast. Moreover, soaking removes excess starch and rice tastes better. Aftering soaking, drain the rice properly off the starchy water. For this purpose, put the rice in a sieve above a large bowl that will collect starchy water. Allow draining to take place for at least 15 minutes.

c.      Boil

Take a large pot. You can choose an instant pot, rice cooker or any saucepan with a heavy base. Such a utensil will help conduction of heat evenly. Moreover, the lid of the pan should tightly fit into the circumference of the pan to avoid escape of steam. Now, add rice and water according to the above measurement and let the water boil over medium flame with a closed lid. One you see water boiling, lower the flame and boil the rice for about 12 minutes or till you see no water.

d.      Steam

After your onigiri rice is boiled, turn off the flame and remove the pot from the stove. Keep the lid on and let the rice steam for an additional 10 minutes. Briefly, if you want to cook perfect onigiri rice like a Chef then, follow the above tips and timing sequence.

e.      Cool

Pour out the rice in a large dish, wooden hangiri, or plate lined with butter paper to avoid rice sticking. Use a rice paddle and turn the rice to help them cool and fluff. In short, cooling the freshly cooked onigiri rice is essential to prevent burning your hands.

3.     Make Onigiri Fillings

To save your time and work efficiently, you can begin making onigiri fillings when the rice is soaked. Try different and delicious onigiri filling ideas to enhance the appetite, flavor, and aroma.

a.      Salted salmon onigiri filling

Take freshly cut and  washed salmon fillets. Sprinkle both sides of fillets with your favorite salt as per taste. Then, bake, grill, or toast them at about 200 degree celsius for about 20 minutes or till done. The final results should be flaky and crunchy on the outside and juicy inside. Shred the salmon fillets to flakes, salted salmon onigiri filling is ready.

b.      Umeboshi onigiri filling

Simply deseed Japanese pickled plums and keep the flesh only. You can use plastic wrap and bamboo skewers to aid in the deseeding process. Fresh umeboshi onigiri filling is ready.

c.      Okaka onigiri filling

Take a small bowl and add the measured amount of Katsuobushi. Then, add soy sauce in it and mix to combine well. Make sure to add enough soy sauce to moisten the dried bonito flakes and not overdrench. Okaka onigiri filling is ready.

d.      Tuna mayo onigiri filling

Drain the canned tune off the juice and put tuna flakes in a small bowl. Add Japanese mayonnaise and soy sauce according to the above measurements. Mix to combine well, mayo tuna onigiri filling is ready in just seconds.

e.      Seasoned kombu onigiri filling

Simply unpackage the market-bought seasoned kombu and put it aside.

4.     How to make rice balls?

Cut the nori seaweed sheet into the dimensions you want to wrap the rice balls in. Now follow either of the two following methods to make rice balls.

a.      Traditional Method

Firstly, wet your hands with water to avoid rice sticking and smashing. Then, rub some salt in the palms of your hand evenly. Do not use excess salt or else your rice will become too salty. Here, the purpose of using salt is to preserve the onigiri rice for a long time. The best way is to use sea salt/ kosher salt as it is less salty than the table salt.

Then, scoop out approximately ⅓ cup of rice in your hand. Press in the middle of rice and create a well. Add 1 to 2 tablespoons of your desired and already prepared onigiri filling. Then, roll the rice with your palms from the side and hide the filling. Apply gentle pressure with your fingers and mold the slightly sticky rice into your desired shape.

Make sure not to apply too much pressure or else you will squeeze out the filling and smash the rice grains. Finally, wrap the beautifully shaped Japanese rice balls in nori sheets. You can also put some onigiri filling on the top to identify various onigiri fillings and seasonings.

b.      Modern no-touch method

The modern No-touch method does not involve using hands to make rice balls. This alternative method of onigiri recipe uses a rice bowl, plastic sheet, and a rice scooper. For this purpose, first spread the cling film sheet in the bottom of a small rice bowl and scoop out some rice. Spread the rice evenly and add your favorite onigiri fillings in the centre. Then, wrap up the plastic sheet from the sides and twist the top to make a perfect shape. You can make perfect spheres or triangles with this method easily.

5.     Serve and Moist

Seve the onigiri until it is warm and moist. Avoid drying and hardening of rice before you serve them. For this purpose keep the rice balls covered. See the FAQs section to know more about storing cooked onigiri.

onigiri

Onigiri Filling Ideas

Previously, there were many unique onigiri fillings that people used to stuff steamed rice. But nowadays, any leftover meal serves as an exciting filling of the rice balls. For instance, chicken karaage, chicken tatsuta age, and shrimp tempura. The traditional and popular onigiri fillings are below:

  • Okaka (bonito flakes and soy sauce)
  • Kombu (steeped kombu kelp)
  • Tuna Mayo Spread (canned tuna with mayonnaise)
  • Tarako (salted cod fish roe)
  • Umeboshi (Pickled Plum)
  • Sha-ke (salted Salmon)
  • Yaki-shake( grilled salmon)
  • Tori Gomoku, Chicken Gomoku (chicken and vegetables)
  • Cream cheese and salmon flakes

Nutritional Value of Japanese Rice Balls (Onigiri)


Nutrients Percentage Daily Value
Total Carbohydrates 44 grams
Protein 6.7 grams
Total Fats 0.9 grams
Cholesterol 0.141 grams
Sodium 0.404 grams
Potassium 0.06 grams
Vitamin A 0.9%
Vitamin B1 1.8%
Vitamin B2 2.6%
Vitamin B3 4.7%
Vitamin B5 1.9%
Vitamin B6 4.3%
Vitamin C 0.3%
Iron 1.2%
Zinc 0.5%
Magnesium 0.9%
Manganese 0.8%
Phosphorus 2.5%
Selenium 6.3%
Folic acid 0.8%


*%daily values may vary according to your need and kind of ingredients used

FAQs:

What kind of rice should we use to make Japanese rice balls?

To make perfectly shaped onigiri, you should use short or medium grain rice. These rice stick well and make perfect spheres for Japanese rice balls. The popular and reliable brand for short grain rice is Koshishikari. The original onigiri recipe recommends the Koshihikari brand for onigiri rice.

What is the difference between an onigiri and a sushi roll?

Onigiri and sushi both recipes resemble a lot because they comprise steamed rice, fish fillings, and seaweed wraps. However, there is one big difference: The Japanese rice balls use only steamed rice that is slightly seasoned with kosher salt. Whereas, sushi rolls use vinegared rice to prolong the rice’s shelf life.

Why is salt rubbed on your hands while making Japanese rice balls?

Rubbing salt on hands while making onigiri is a practice of old Japanese. When onigiri was introduced, there were no refrigerators and people used things like salt and vinegar to prolong the shelf life of rice. They do this to preserve the steamed rice and to give them a perfect saltiness. Since then, onigiri uses salt while sushi rolls use vinegar as preservatives.

How to store Onigiri accurately?

Rice when refrigerated becomes dry, dehydrated, and hard. Therefore, it’s best to prepare onigiri fresh and consume it right away. Nevertheless, if you desire to eat the leftover Japanese rice balls the next day then, store them in the refrigerator. Make sure to pack the rice balls in a sheet of cling film or in an airtight container. In addition, you can cover onigiri packed in a tiffin with a damp kitchen towel.

The Pastry Cooks’ Savoury Innovation of the Japanese Pancake: Okonomiyaki Recipe

Okonomiyaki Recipe

Is it boring to eat sweet pancakes all the time? How about trying savoury pancakes?  From my perspective, it’s a definite YES. Let’s try out the Japanese popular street food named Okonomiyaki. No worries! If you don’t live in Japan, you can still taste the original okonomiyaki at your home. The simple solution is to cook hygienically yourself and we’ll disclose the pastry chef’s secret okonomiyaki recipe for you.

As the term okonomi means “as you like” and yaki means grill, you can cook these Japanese pancakes however you like. In a nutshell, besides the basic ingredients for okonomiyaki batter and okonomiyaki sauce, you can add all your favorite ingredients. Just Cook Okonomi! 

What is Okonomiyaki?

Okonomiyaki is a popular Japanese street food. This Japanese pancake finds its origin in Osaka where it was first introduced at a shop in the 1930s. It can be described as a fluffy and savoury version of thin crepes known as funyaki. Okonomiyaki is made with okonomiyaki flour  folded with fluffy eggs, assorted vegetables, proteins and drizzled with tangy condiments and sauces. Follow our secret okonomiyaki recipe, cook it like a Pro and tantalize your taste buds with scrumptious Japanese pancake okonomiyaki.

Regional Styles of Okonomiyaki Recipe

Though okonomiyaki is originally a dish of Osaka, many regions of Japan cook it in their own style. While following the basic recipe, these pastry chefs only customize the filling ingredients to make them taste their own. You can note down the following okonomiyaki recipe and can adjust the add ons according to the style you want. 

Hiroshima-style okonomiyaki

Hiroshima cooks make okonomiyaki in a style they use to make pizza i.e the layering method. They first put some okonomiyaki batter on a hot plate or grill.  Then, they add cabbage, proteins of their choice, sprinkle herbs, and drizzle okonomiyaki sauce. By this layering method they usually make Japanese cabbage pancakes. 

Modan-yaki 

The modan-yaki version of okonomiyaki says “the more, the merrier.” Rather than following just a simple okonomiyaki recipe, they prepare tasty additions. For example, Japanese stir fried noodles (Yakisoba) or udon noodles, which usually go on top of okonomiyaki.

Monjayaki 

Monjayaki okonomiyaki is a popular street food throughout Tokyo where it is famously known as monja. It’s indeed a thin, stretchy, and softer version of the original okonomiyaki. The secret behind this heavenly creamy texture is an extra amount of dashi added to the batter. Moreover, the cheesy okonomiyaki are fried in a pan that gives them a golden caramelization on top. 

Negiyaki

Negiyaki is more like a Chinese pancake sprinkled generously with green onions and chives. Sometimes, the pancake  is topped with a half fried egg and dressed up with a lot of aromatic scallions. Moreover, these are thinner and crispier than the original Japanese pancake okonomiyaki. 

Osaka-style okonomiyaki

It’s in fact the original okonomiyaki recipe. It includes a soft and fluffy okonomiyaki batter, mixed all together with veggies, proteins, and drizzled with salivary okonomiyaki sauce. Here, you can use vegetables, proteins, herbs, and spices according to your taste preference. 

Basic Okonomiyaki Ingredients You Will Need:

No matter what style of okonomiyaki you are going to cook, the following are the basic ingredients you will always need. You can buy all these Japanese pancake okonomiyaki ingredients at any Asian grocery store. Moreover, you can also order them online from a reliable Japanese online retailer or from Amazon.

Okonomiyaki Recipe

Okonomiyaki Flour

It’s a special flour that is made with unbleached and organic soy and wheat flour. Okonomiyaki flour does not require you to add extra ingredients to make the pancakes fluffier and thicker. In addition, it is beautifully combined with balanced condiments to make the pancakes taste delicious. If you do not have okonomiyaki flour then, you can use all purpose flour. However, you must add some dough softener, activator or riser, yam or potato starch, and some herbs and spices.

Nagaimo (The Japanese Yam)

The key ingredient of okonomiyaki recipe is the Japanese Yam known as Nagaimo. One can also use yamaimo (mountain Yam) if nagaimo is not available. It is the yam that gives okonomiyaki the fluffy, soft, and creamy texture. Moreover, the slimy sticky juice that comes out when you grate the Japanese yam can cause allergies. Therefore, you should use kitchen gloves while peeling and grating yam for the okonomiyaki recipe. Buy the fresh and supreme quality Nagaimo at any Asian grocery store.

Katsuobushi (Dried Bonito Flakes)

Katsuobushi is the dried, thin, and crispy flakes of fermented and charred bonito fish. It is a great ingredient that gives Japanese dishes an ultimate umami flavor. Katsuobushi is also used to make dashi (the Japanese stock that we use for miso soup) we add in the okonomiyaki batter. Moreover, these super delicious dried bonito flakes are sprinkled on top of soft pancakes to create textures in the dish. However, it’s not a must-have okonomiyaki ingredient, you can eliminate it if you don’t want a fishy flavor.

Tenkasu (Tempura bits)

Tenkasu is not a healthy ingredient and many people wish to omit it. Nevertheless, according to the Osaka cooks, it’s an important ingredient to make soft and fluffy okonomiyaki. A great DIY hack to replace tempura bits is to use the leftover okonomiyaki batter. All you need is to drizzle the drops of remaining batter in hot oil and let them fry to golden-brown. Moreover, you can also try dried and crispy shrimp crisps as a substitute for tempura bits.

Okonomiyaki Sauce

Is it possible to make a Japanese pancake recipe without okonomiyaki sauce? Definitely, not. You cannot enjoy okonomiyaki pancakes without a generous drizzle of okonomiyaki sauce. There are many commercial brands that are manufacturing delicious okonomiyaki sauces. Nevertheless, if you are concerned about health and hygiene, you can make it yourself. Read the following best okonomiyaki sauce recipe.

Japanese Mayonnaise

Japanese mayonnaise along with okonomiyaki sauce makes a tangy and creamy sauce that goes heavenly with soft pancakes. Other mayonnaise i.e. American mayonnaise cannot give that particular flavor. Therefore, shop for a bottle of Japanese mayo from any Asian grocery store or from Amazon. Use it for many Japanese dishes.

Aonori (Seaweed)

Aonori is a deep green dried seaweed powder. It’s the best source to give umami rich flavor to your Japanese pancake okonomiyaki. Japanese use various types of seaweed for their particular Japanese dishes. Just like kombu is used for sushi rice, nori for miso soup, aonori is particularly used for okonomiyaki. 

How To Make Okonomiyaki?

Okonomiyaki Recipe

Okonomiyaki Ingredients

Okonomiyaki Batter Ingredients:


Ingredients Measurement
Okonomiyaki Flour (or all purpose flour) 1 cup
Large eggs 4
Tenkasu (tempura bits) ½ cup
Kosher salt ¼ teaspoon
Sugar ¼ teaspoon
Baking powder ¼ teaspoon
Nagaimo 0.15 kilograms
Dashi ( japanese stock) ¾ cup
Pickled red ginger ¼ cup

Filling and Layering Ingredients:


Cabbage 1 large
Pork belly ½ lbs sliced
Vegetable oil As needed

For Okonomiyaki sauce:


Worcestershire sauce 3 ½ tablespoon
Oyster sauce 2 tablespoon
Ketchup 4 tablespoon
Sugar 1 ½ tablespoon

Classic Okonomiyaki Toppings You May Need

  • Japanese mayonnaise
  • Okonomiyaki sauce
  • Katsuobushi
  • Aonori 
  • Green onions
  • Pickled red ginger
  • Ham slices
  • Yakisoba Noodles
  • Half fried Egg
  • Dried Oregano
  • Melted Cheese
  • Cream Cheese

Time-Tested Okonomiyaki Recipe and Instructions

Gather and Measure all ingredients:

For hassle and mess free cooking, it’s essential to gather all ingredients first. Then, put out all the cooking utensils and tools you will need while cooking. Measure out all the ingredients and put them in separate bowls so you can easily pour them at the right time. Also, wash all the vegetables and proteins you are using to layer up your okonomiyaki pancakes.

Preparing Okonomiyaki Batter:

Take a large bowl and combine all dry batter ingredients i.e. okonomiyaki flour/ all purpose flour, salt, sugar, and baking powder. Then, combine already washed, peeled, and grated nagaimo into a bowl with freshly cooked dashi. Read our miso soup blog to know how to cook dashi. 

Finally, add liquid ingredients into the dry ones and fold the batter to mix it properly. 

You can also cool and set the batter overnight. This step is essential to make your pancakes fluffy, soft, and creamy textured. Cover the okonomiyaki batter bowl with a plastic cling film sheet and refrigerate for an hour. Meanwhile, start preparing your okonomiyaki sauce to drizzle okonomiyaki pancakes. 

Making Okonomiyaki Sauce:

Take a small ball and pour out a measured amount of worcestershire sauce, oyster sauce, and ketchup. Mix all the sauces and then add sugar into it. Mix again till the sugar dissolves. No heating is required to make the sauce thicker, pourable, and creamy. It is because Worcestershire sauce is itself so thick and rich. Set it aside.

Prepping Filling Ingredients:

This step involves preparing all other ingredients that you are going to use in your okonomiyaki recipe. Cabbage is the most essential and classic ingredient of okonomiyaki. Shred the cabbage in thin slices and set it aside. Moreover, you can cook and marinate proteins of your choice or can prepare yakisoba noodles at this step.  

Cooking Okonomiyaki:

After resting the batter for an hour in a fridge, remove it. Put it at room temperature then add 4 large eggs in it, tenkasu, and pickled ginger. Mix well to combine. Then, add shredded cabbage into it if you are going to make osaka style okonomiyaki. 

Moreover, if you are going to cook hiroshima-style okonomiyaki then, add batter first on a hot plate and layer up your favorite ingredients. Here we are cooking osaka-style okonomiyaki so proceed with a pancake batter with added ingredients. 

Take a large pan, hot plate, or iron griddle, pour some non-aromatic vegetable oil and heat the pan on medium flame. Check the temperature of your frying pan, it should be between 200 to 400 degree fahrenheit. Then, spread about 1 cup of batter. Make sure it should not flow to thin crepe and should be thicker. 

Once the bottom of your Japanese pancake okonomiyaki begins to cook, layer the top with 2-3 pork belly slices. Cover the pancake with a lid so that heat captured can cook pork slices on top. You can flip the pancake once it gets golden brown from the bottom. Press and reshape it with a pancake spatula. 

At this time, you can also add grated cheese for a velvety texture and heavenly creamy taste.  In short, cook each side of the Japanese pancake okonomiyaki for about 5 minutes. Plate out the cooked okonomiyaki and drizzle generously with okonomiyaki sauces and condiments.

Serving Idea for Okonomiyaki:

Using a silicone brush, spoon, or sauce bottle, add okonomiyaki sauce generously. You can also add Japanese mayo if you like it. Then, sprinkle some katsuobushi and aonori to get the rich umami flavor. You can also add a half fried egg on top if you are making okonomiyaki for breakfast or brunch. Garnish with green onions, pickled red ginger, black pepper, and dried oregano. However, you can choose your own toppings and seasonings based on your taste and availability of ingredients.

Optional Ingredients to Spruce Up the Taste of Okonomiyaki

Ingredients that are usually used and taste delicious:

Calamari, scallops, dried shrimps, cheese, chives, scallions/ green onions, pickled ginger, yakisoba noodles, shiso leaves, and rice cakes.

Ingredients making weird yet delectable combos:

Mushrooms, bean sprouts, fresh garlic slices, corn on the cob, potatoes, octopus, spicy cod, crispy potato chips, and kimchi.

FAQs

What Are the Best Dining Options of Okonomiyaki Near Me?

How can I enjoy okonomiyaki near me in a restaurant? Japanese restaurants and street shops offer you 3 dining options. Chefs make okonomiyaki in front of you at a counter at the front of a huge teppan (iron griddle). Also, you can cook your own meal at a table that has a built-in teppan (iron griddle), but the staff will assist you if you ask. Moreover, Chefs make okonomiyaki e in the kitchen, then place on the iron griddle for you so it stays warm for as long as you start your meal.

What is the purpose of adding nori in okonomiyaki?

In Japanese cuisine, this seaweed is generally used to enhance dishes such as okonomiyaki, takoyaki, and yakisoba with a strong umami flavor. When sprinkled on top, seaweed enhances the dish and lends the food a distinct and appealing aroma.

How to Store Cooked Japanese Pancake Okonomiyaki?

You can store okonomiyaki pancakes without adding sauce and mayo to it. It is because sauces can reduce the shelf life of Japanese pancake okonomiyaki. Moreover, you can store okonomiyaki both in the freezer and refrigerator. 

While you are going to freeze, make sure to use zipper lock bags so that your pancakes won’t frost for a month. In addition, to store it in a fridge, wrap each pancake in an aluminum foil. Okonomiyaki will stay fresh for 3 days. In case you happen to frost pancakes, first defrost them and retoast in an oven.

Can we cook Okonomiyaki Batter in a Hot Plate?

Yes, hot plates or hot irons are used at Japan street shops to make a batch of okonomiyaki at once. Nevertheless, if you are throwing a party or oriental cuisine, you can make a lot of okonomiyaki on a hot plate. On a small scale, you can use a frying pan to cook okonomiyaki for brunch and evening snacks.

What is the Nutritional Info of Okonomiyaki?

1 large pan of okonomiyaki provides you a total of approximately 1400 calories. Percentage daily values are based on a direct of 2000 calories. Below information may vary according to the different okonomiyaki cooking styles. Moreover, consult a dietician if you are on a medically restricted diet.

Total carbohydrates 23 grams
Total fats 10 grams
Proteins 14 grams
Sodium 280 milligrams
Cholesterol  112 milligrams
Vitamin C 51%
Vitamin A 10%
Calcium  5%
Iron  12%

SANRAKU @ All Rights Reserved.